💻 Vibe Coding
This sharing is about the practical side of Vibe Coding. I’ll introduce how product managers can collaborate with AI to build product demos like the Treasure Box Knowledge Base and Bailing Admin Dashboard, submitting 50,000 lines of code without writing a single line manually.
Main topics:
- Starting from an idea or a one-sentence requirement: Web-based “Who is the Spy” assistant
- Starting from design mockups or existing pages: Treasure Box Knowledge Base Demo
- Advanced projects: Spec Driven - Bailing Admin Dashboard Demo
Demo
Last week, I used Figma + Claude Code to generate an MVP version of a knowledge base feature in about 10 minutes, then had a quick sync with the project team to optimize it. Previously, this kind of work might have required the next iteration, taking 2 weeks or even longer. The generated code isn’t perfect, but the time saved allowed me to focus on optimizing core algorithms and user experience, iterating through 3 versions in less than a day. This speed was an incredibly satisfying experience for me.
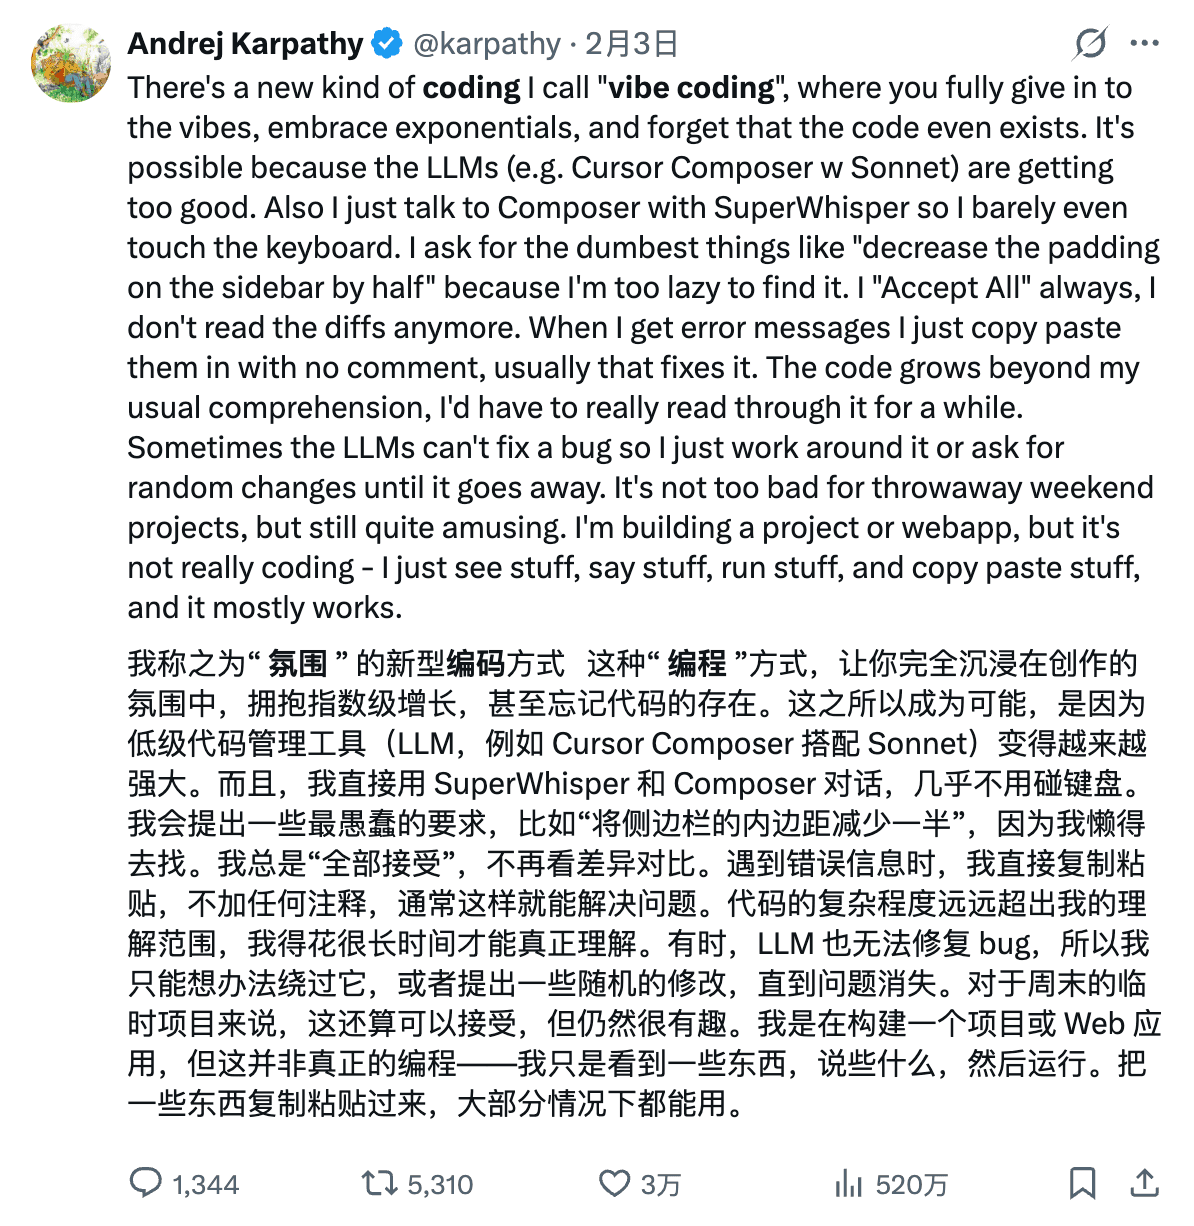
What is Vibe Coding
The concept of “Vibe” was first proposed by Karpathy. As Karpathy described, this “vibe” refers to a programming approach that allows people to fully immerse themselves in the creative atmosphere, embrace exponential growth, and even forget that code exists.
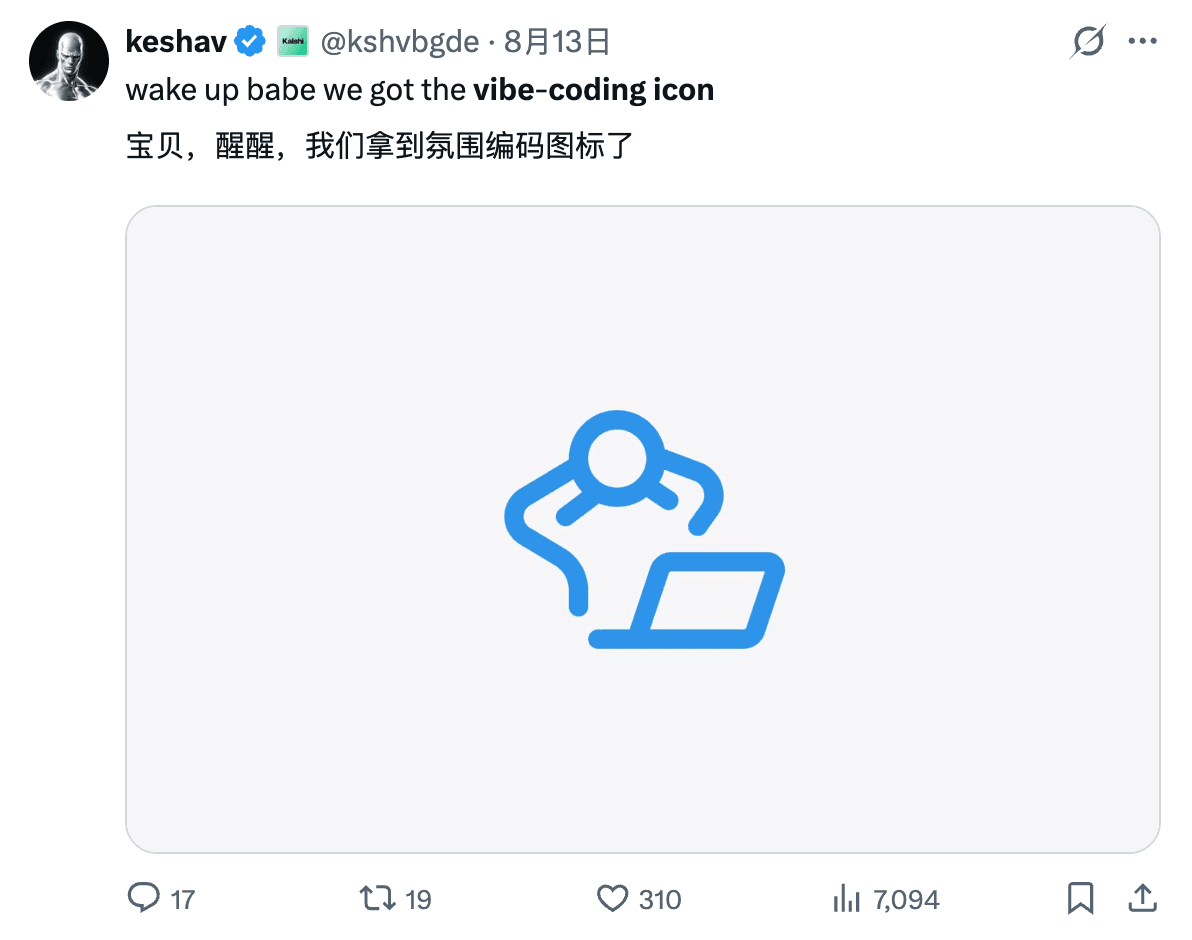
Although it’s difficult to understand, this description is quite accurate. The beauty of Vibe Coding is that the whole process is very chill. While watching AI work coolly, I can lean back in my chair, estimate AI’s output for this round, and plan the next query. I once heard someone designed an icon for Vibe Coding, and it’s really fitting. As they say, “calm and composed, handling everything with ease.”
As a PM, the Greatest Value of Vibe Coding for Me
- Idea validation (rapid prototyping, self-iteration)
- Communication efficiency
- Generating PRD documents, test cases, and evaluation sets based on demos
Practical Sharing
Next, I’ll share three approaches to Vibe Coding through 3 specific cases:
- Starting from an idea or a one-sentence requirement: ChatGPT/Claude web -> IDE (VSCode, Cursor)
- Starting from design mockups or existing pages: Figma/Loveable to initialize UI -> IDE (VSCode, Cursor)
- Spec Driven: Github Spec Kit
Case Study 1: Web-based “Who is the Spy” Assistant
Vibe Coding lowers the barrier to programming significantly - you don’t need to understand design planning or coding engineering. Everything starts from an idea or a one-sentence requirement. Today’s LLMs are very intelligent; just give them an idea, and AI can help refine the solution from various perspectives.
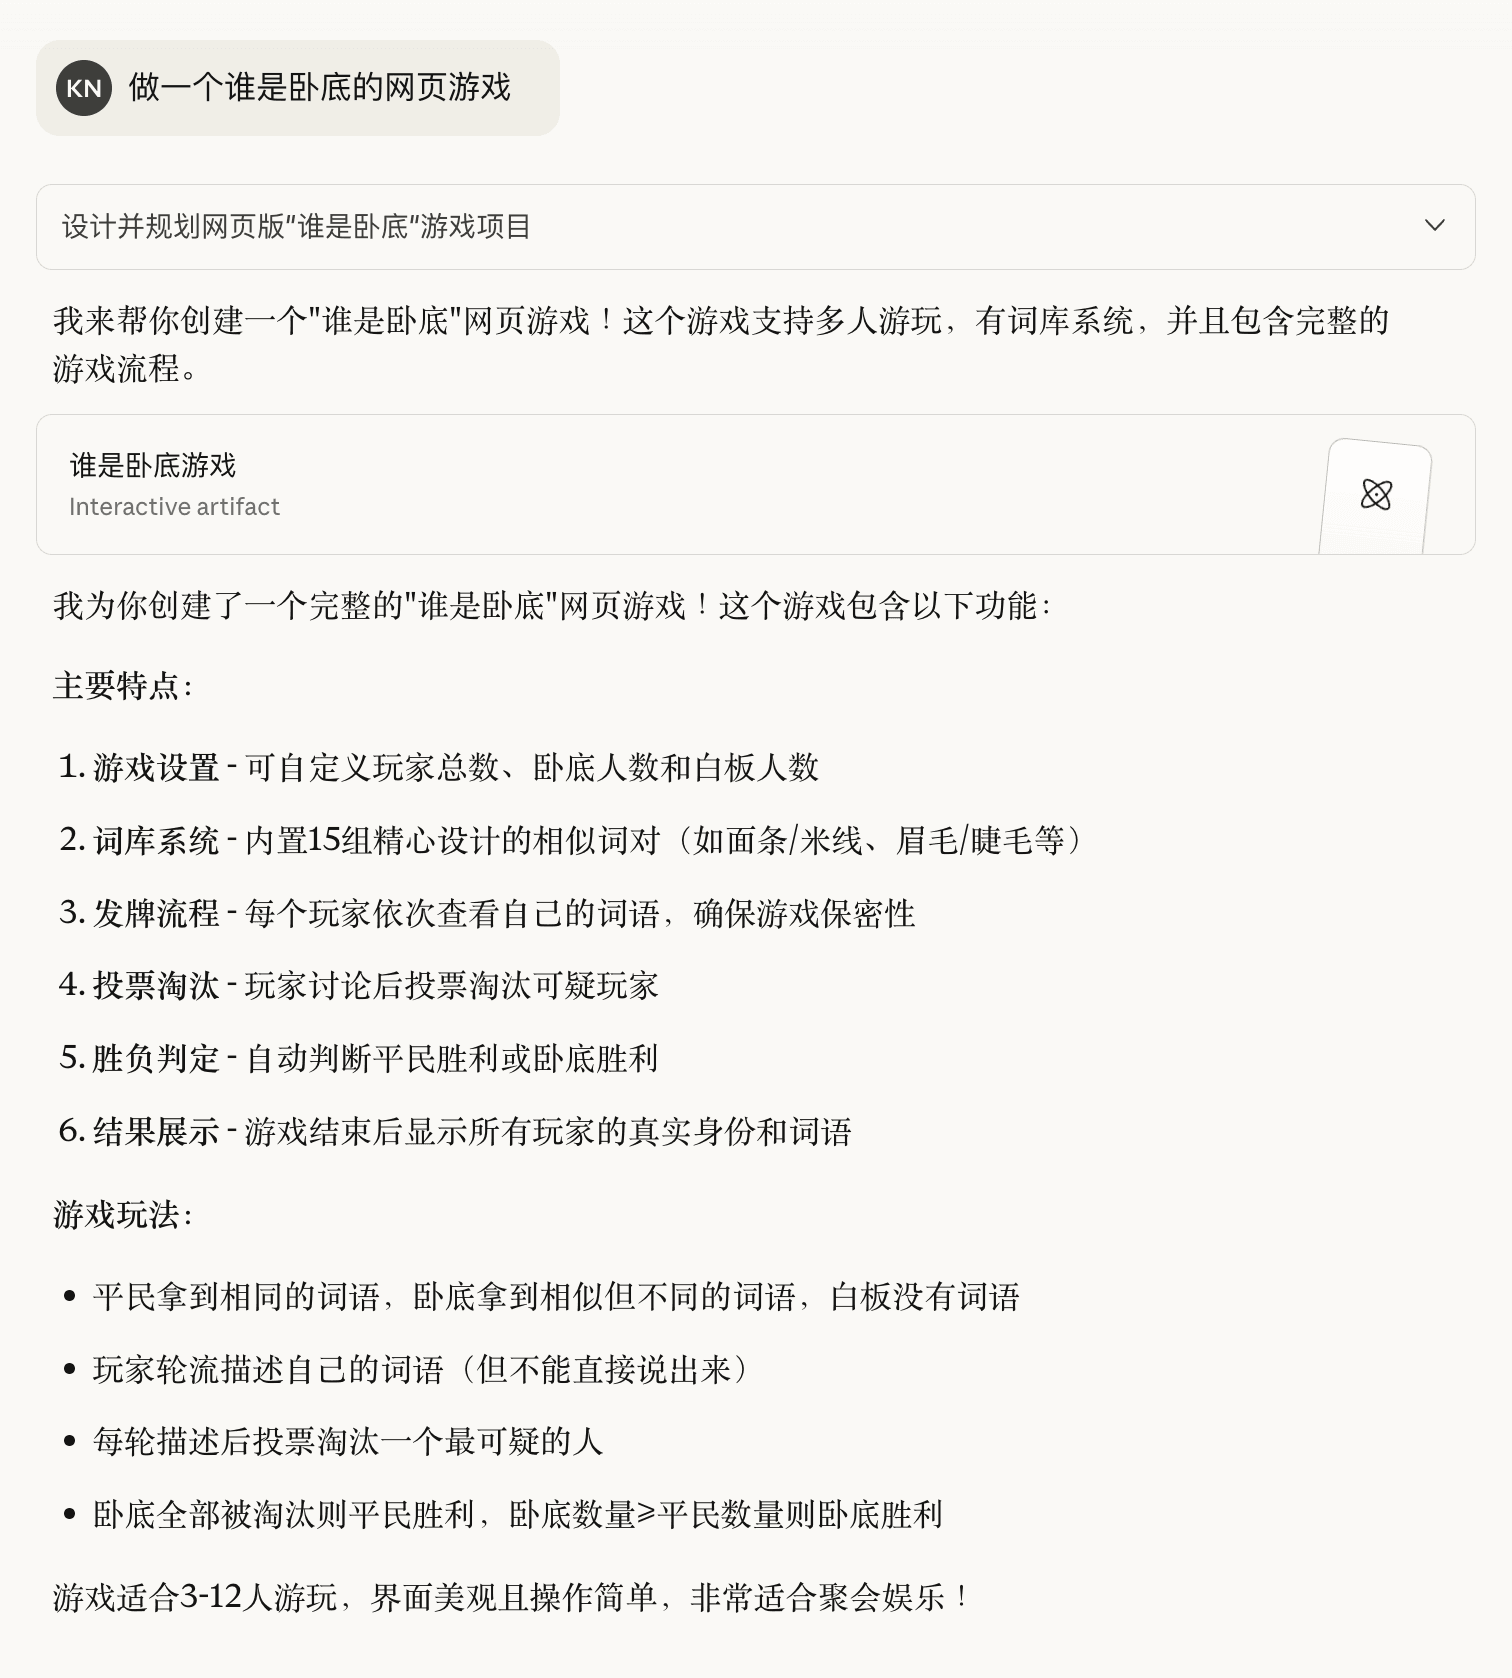
Here’s a case where I built a “Who is the Spy” assistant with Claude:
👽 Who is the Spy - Web Version
- Simple, direct, decent results
- Easy to adjust gameplay logic, AI implements it well
- Difficult to fine-tune frontend UI
After 3-4 rounds of unsuccessful conversations, to fine-tune the UI more precisely, I downloaded the code locally and continued optimizing using VSCode + Claude Code plugin.
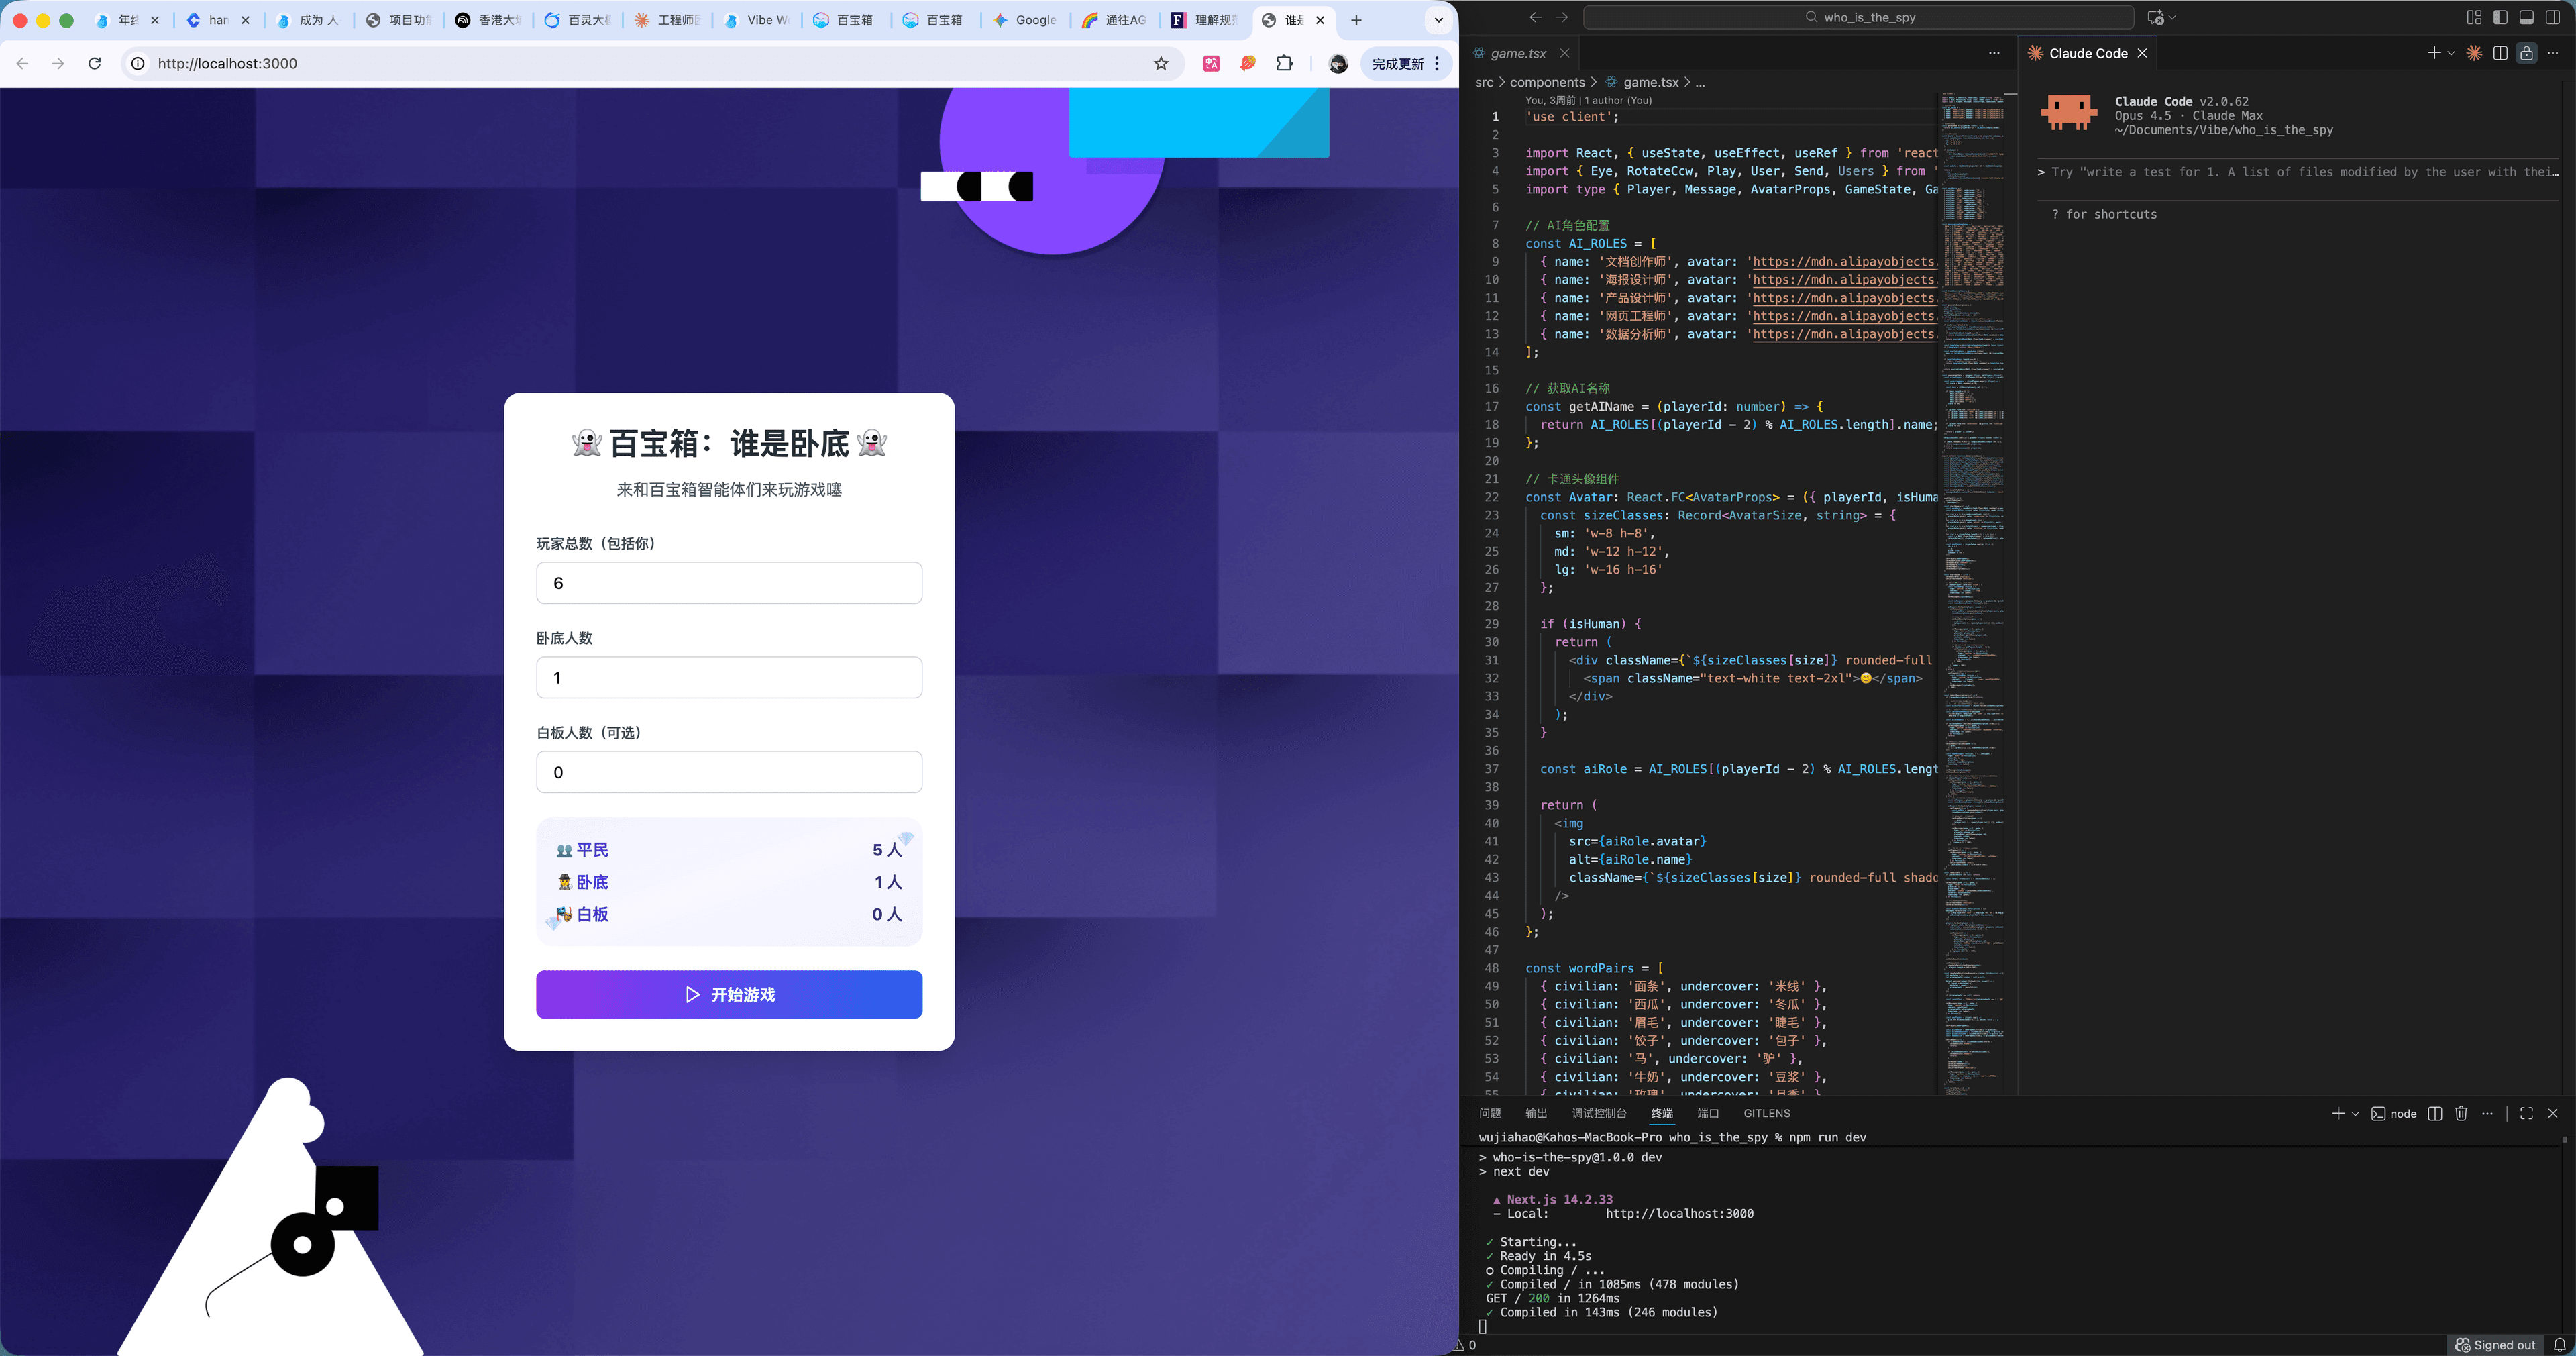
The image above shows my workspace: chatting with Claude Code on the right (CLI mode recommended), observing page effects on the left, leaving the middle column for manual code adjustments (though barely needed).
Some tips for using Claude locally:
TIP
- Always run /init, otherwise Claude can’t understand the full project scope. After refactoring, run /init again
- Use Plan Mode wisely. When a problem persists after 2-3 attempts, enable Plan Mode to let the model plan changes first and confirm with you before executing
- Refactoring beats patching. Refactoring is exhausting for humans, but models don’t get tired. If patches keep failing, try starting fresh
- CLI mode can also paste images. Use images to help the model better understand the design
- There are more advanced features like Claude Skills that I haven’t explored yet. Feel free to share if you know about them
Next, I had Claude Code generate a PRD. After about 10 minutes of generation, Claude completed the task. Testing confirmed this document can successfully replicate the game on other Vibe Coding tools.
Prompt:
Please generate a detailed PRD document based on the current project, providing complete technical specifications so that other LLMs can replicate this project from scratchGenerated PRD document:
📄 Who is the Spy PRD (Click to Download)
Web Generation vs Local Generation
Using IDE + Claude Code is more complex than pure web generation, but often produces better results. Besides platform differences, I believe a key factor is that on the web, LLMs tend to generate SPAs (Single Page Applications), while locally, LLMs tend to generate complete project structures bundled with Vite.
Guess which one is an SPA and which is a full project - both generated by LLMs in one shot:
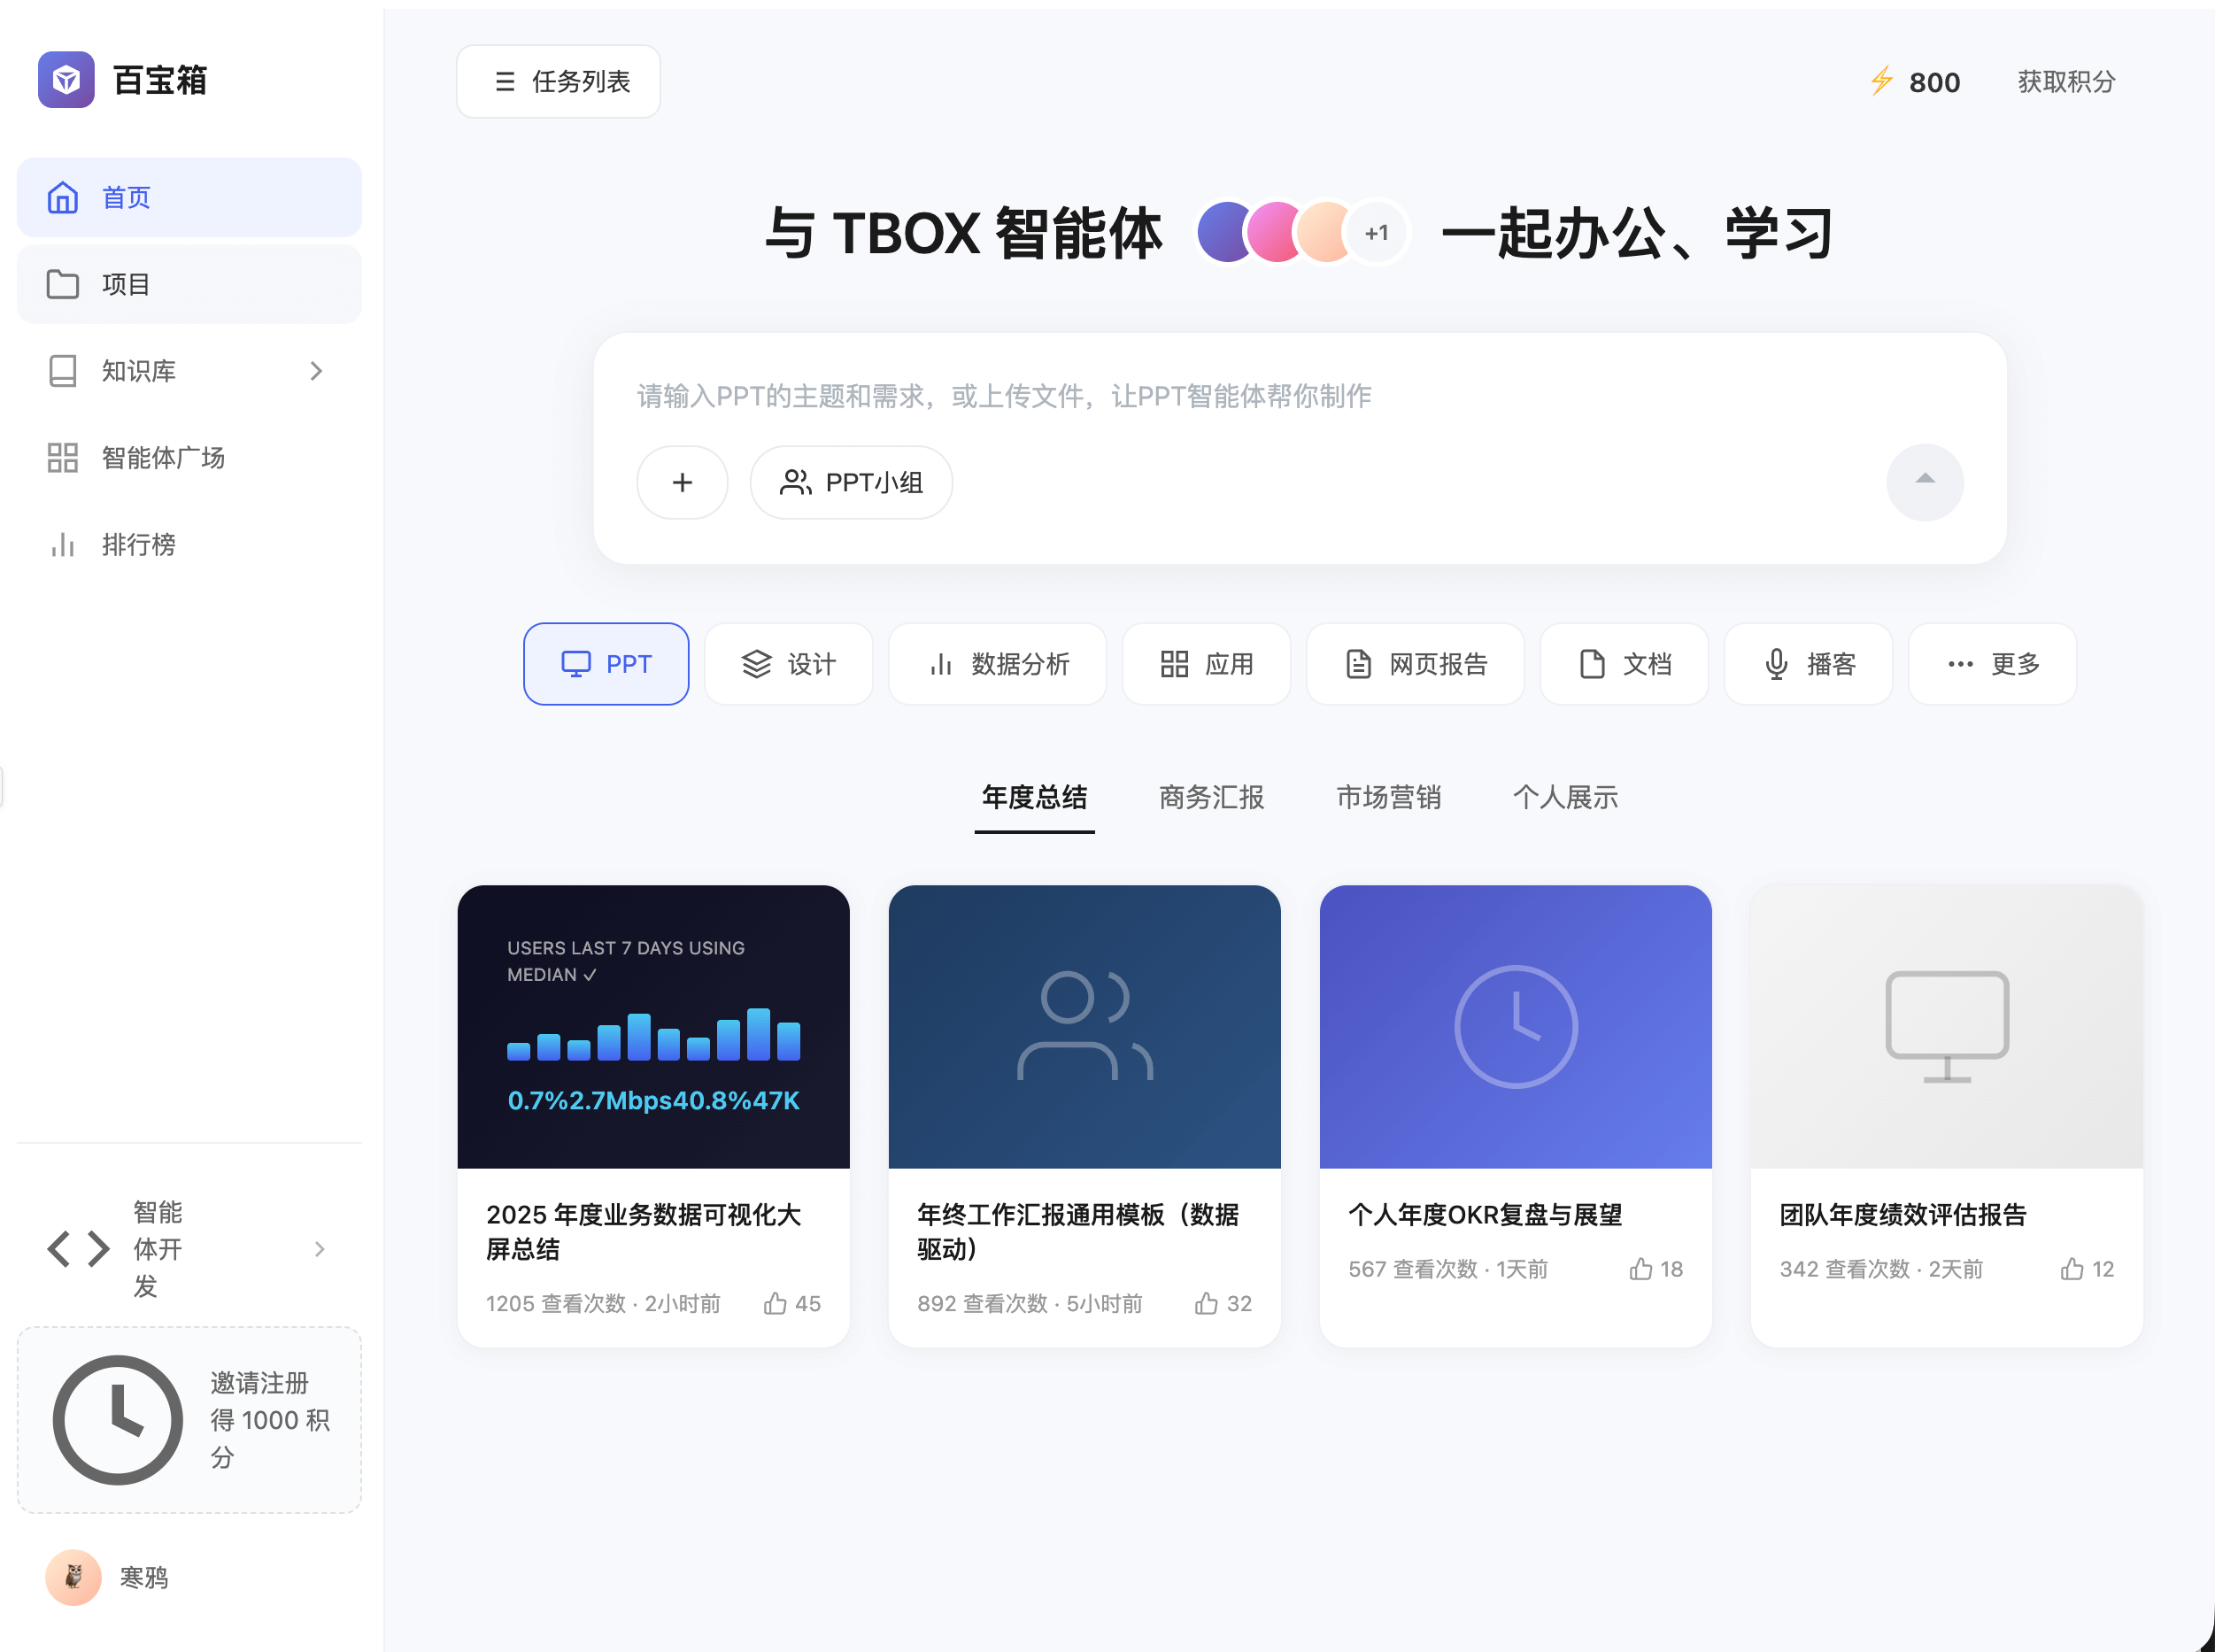
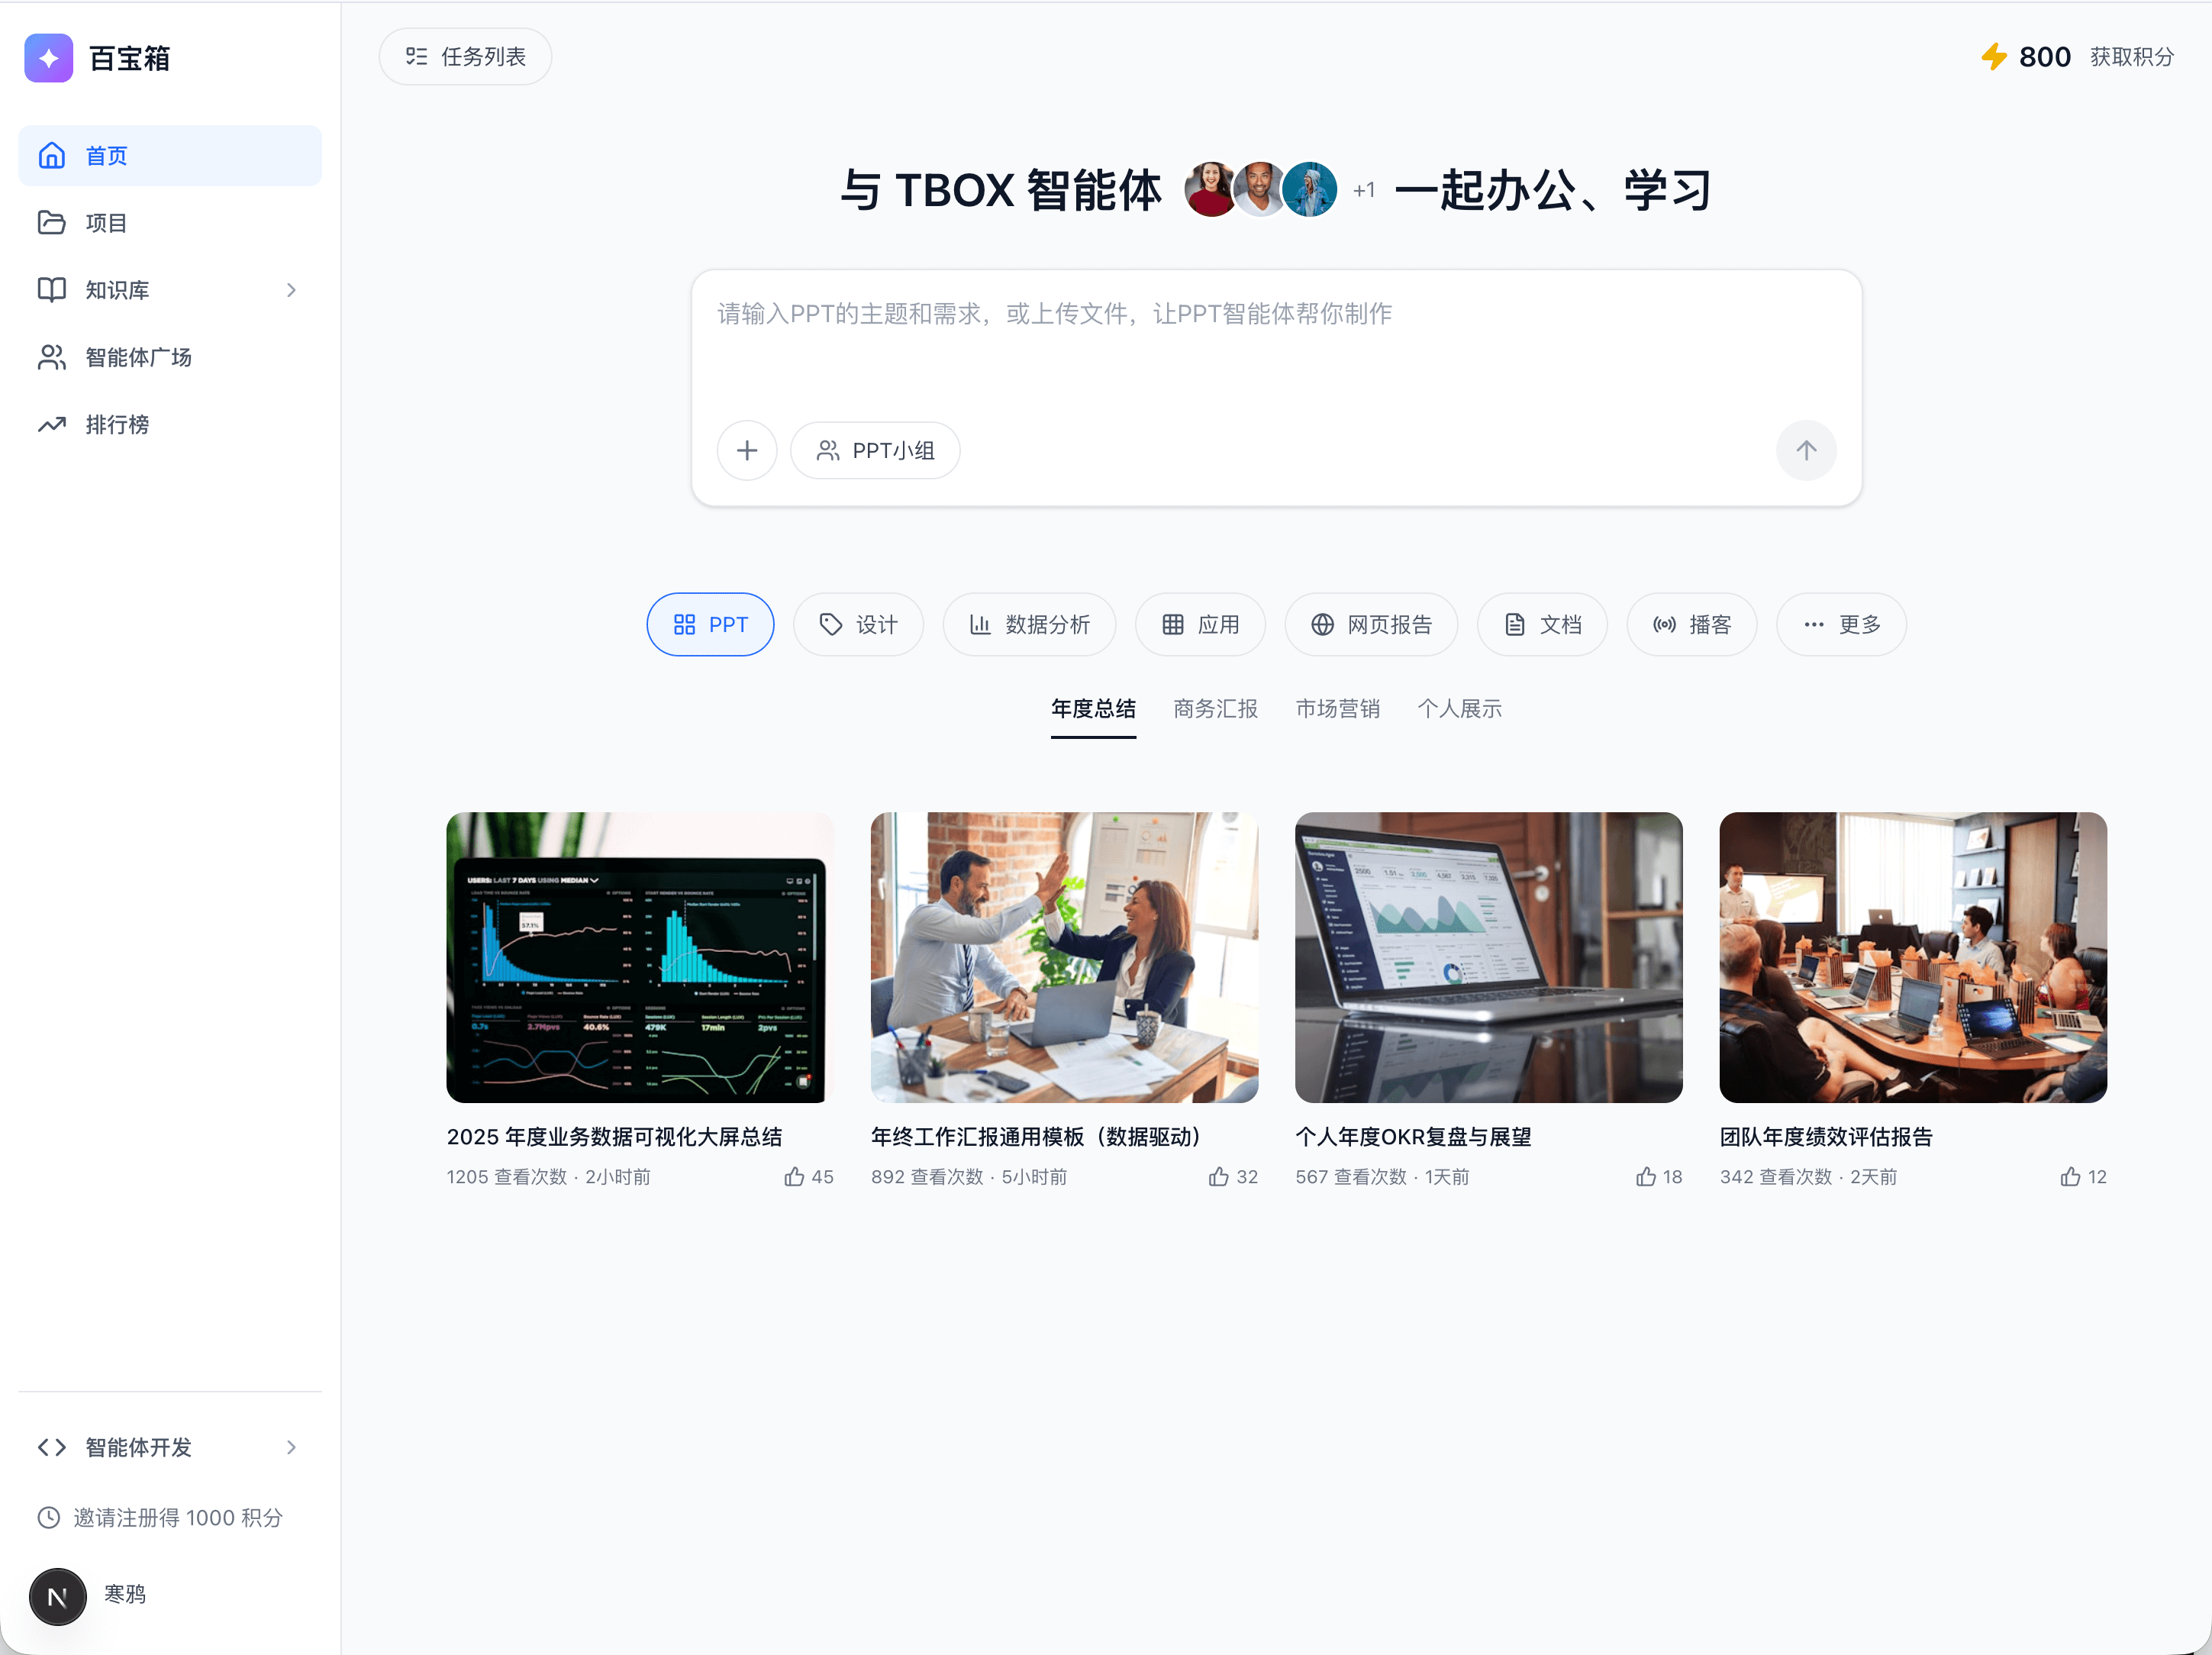
Figure: Left is SPA, right is full project
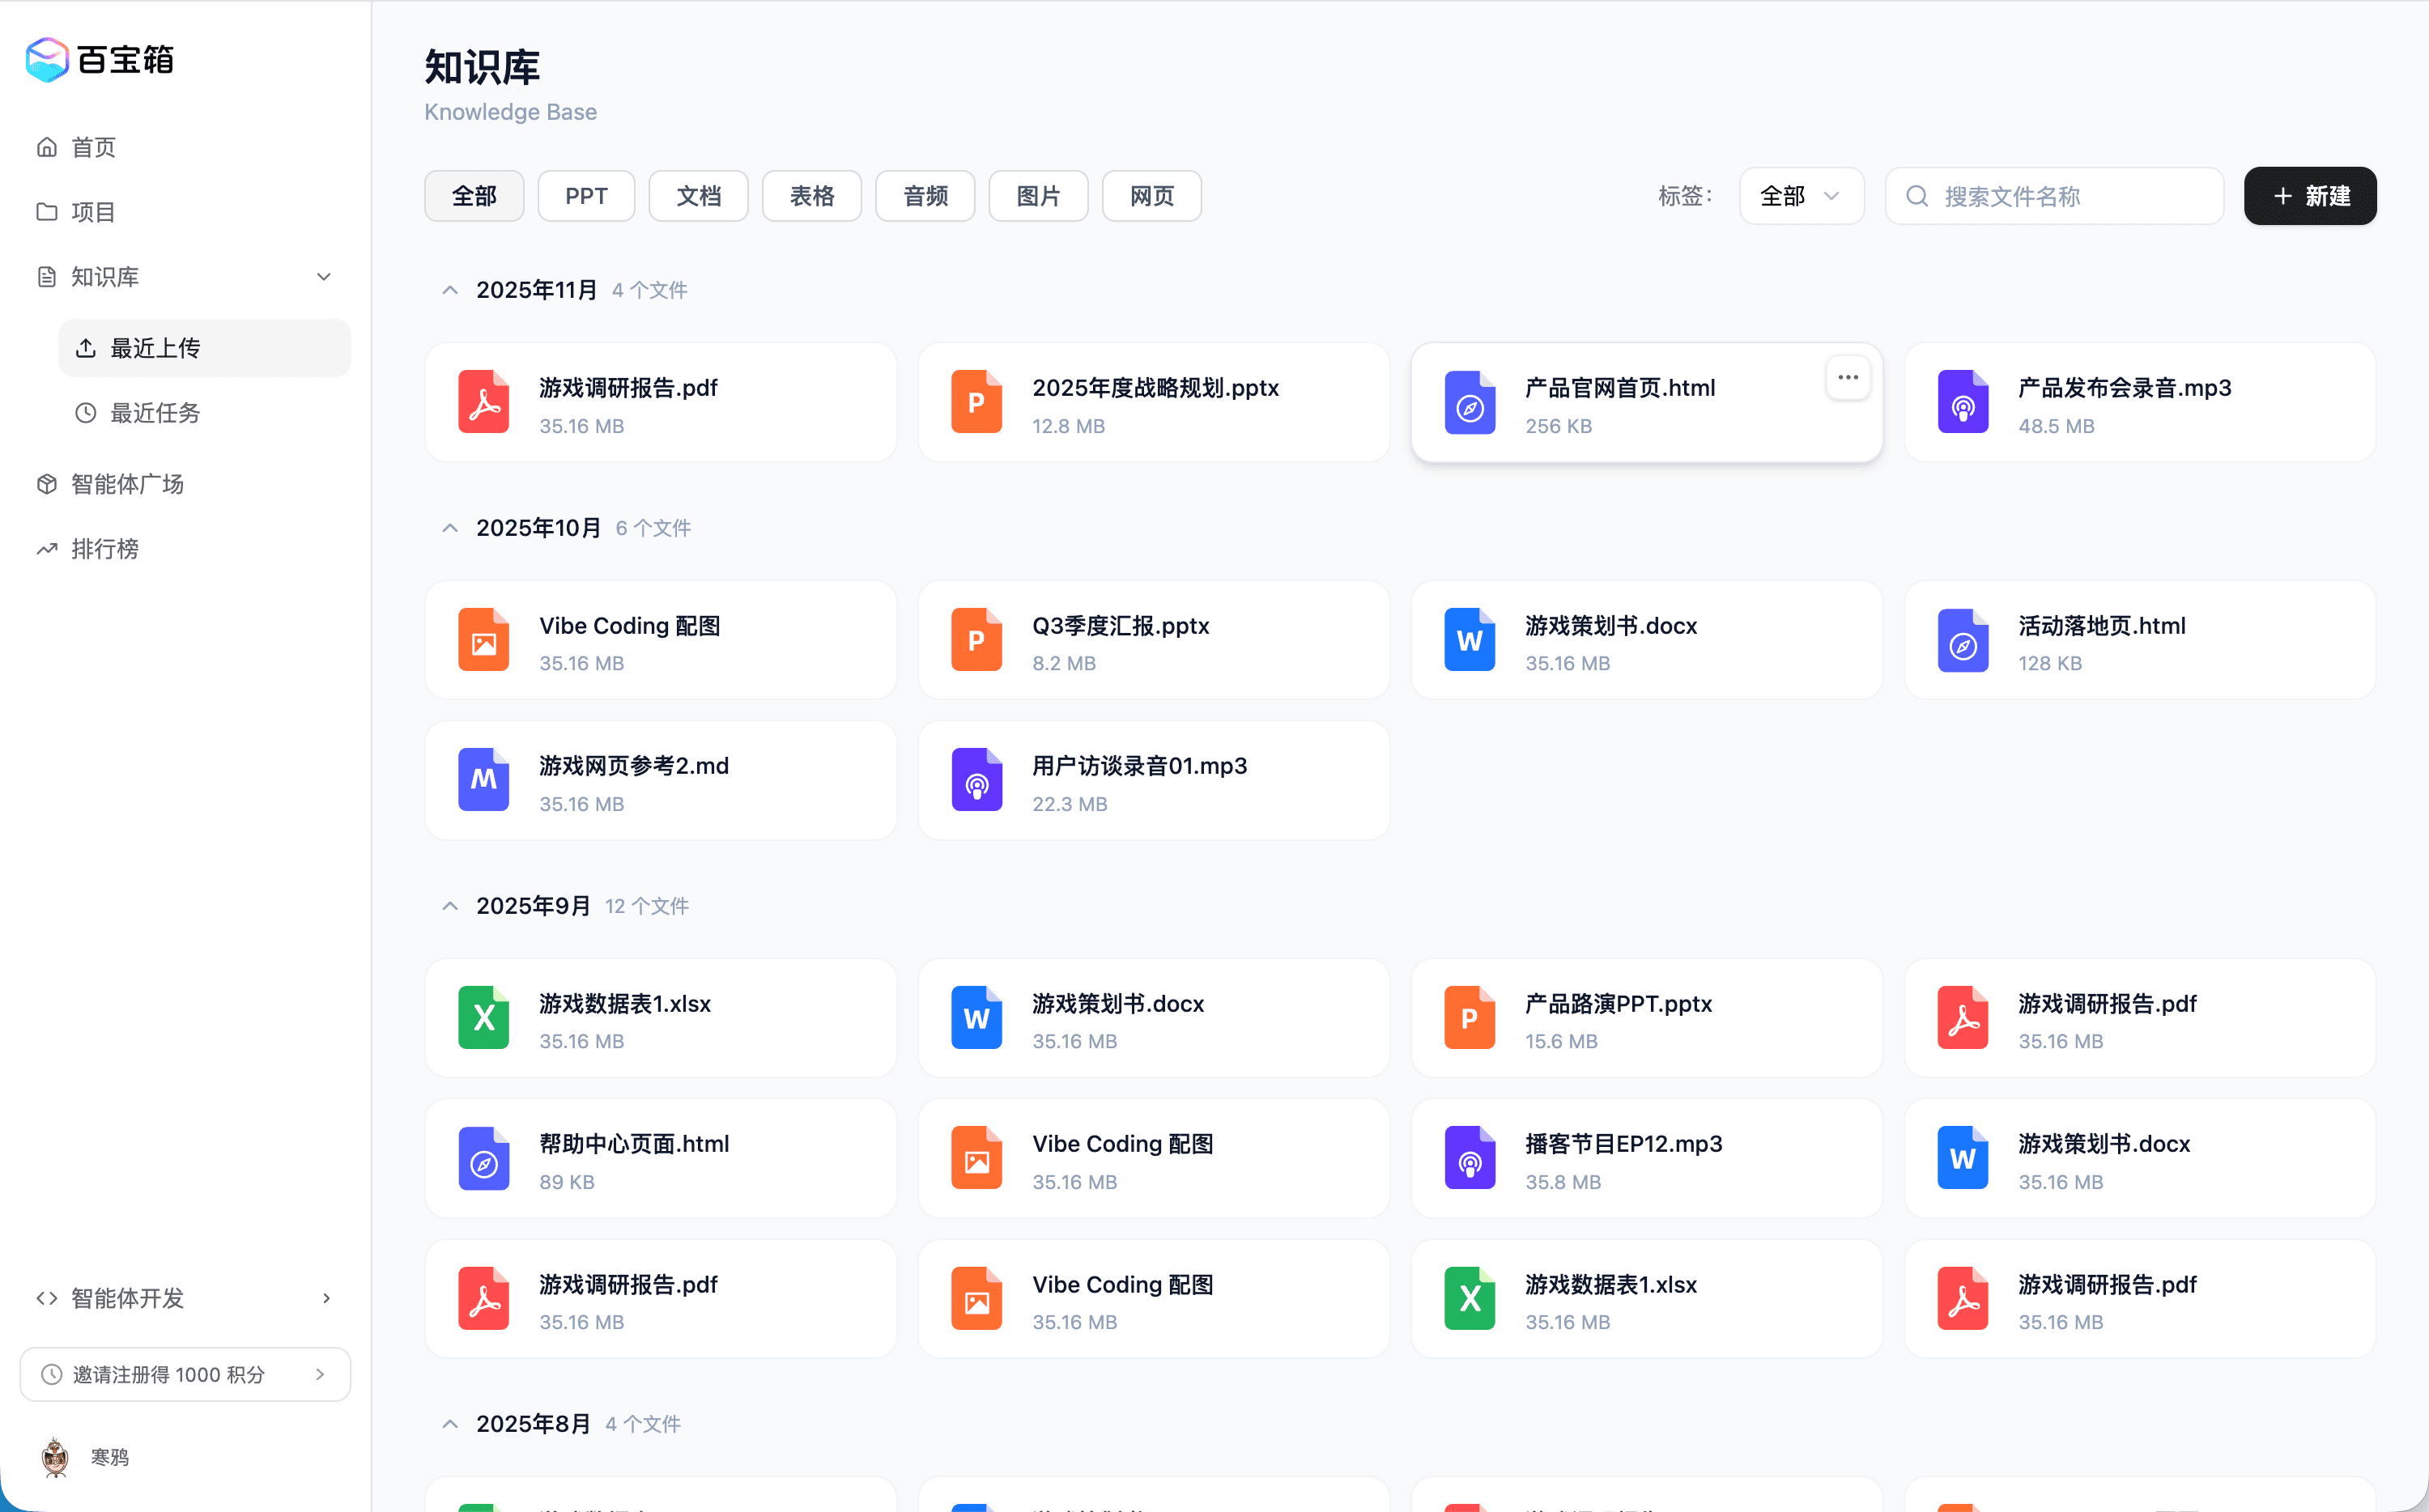
Case Study 2: Treasure Box Knowledge Base Demo
In our daily work, developing a new product or feature from scratch is rare. More often, we need to iterate on existing features or pages. This presents a critical challenge:
How to make the model accurately reproduce existing functional designs?
Those familiar with Vibe Coding know that getting LLMs to accurately reproduce design mockups is very difficult. I’ve tried the following approaches:
- Upload many screenshots, describe details carefully, approach ideal details through multiple rounds of conversation (still the most viable approach)
- Upload frontend code, require strict replication (not viable)
- Use Claude Code with Figma MCP plugin (relatively accurate reproduction, but requires Figma design files)
- Use Figma Make (Gemini 3 pro version), upload few screenshots, combine with visual editor for reproduction
Here, I recommend using online Vibe Coding tools like Figma Make, Loveable, or Google AI Studio’s APP feature for accurate page reproduction.
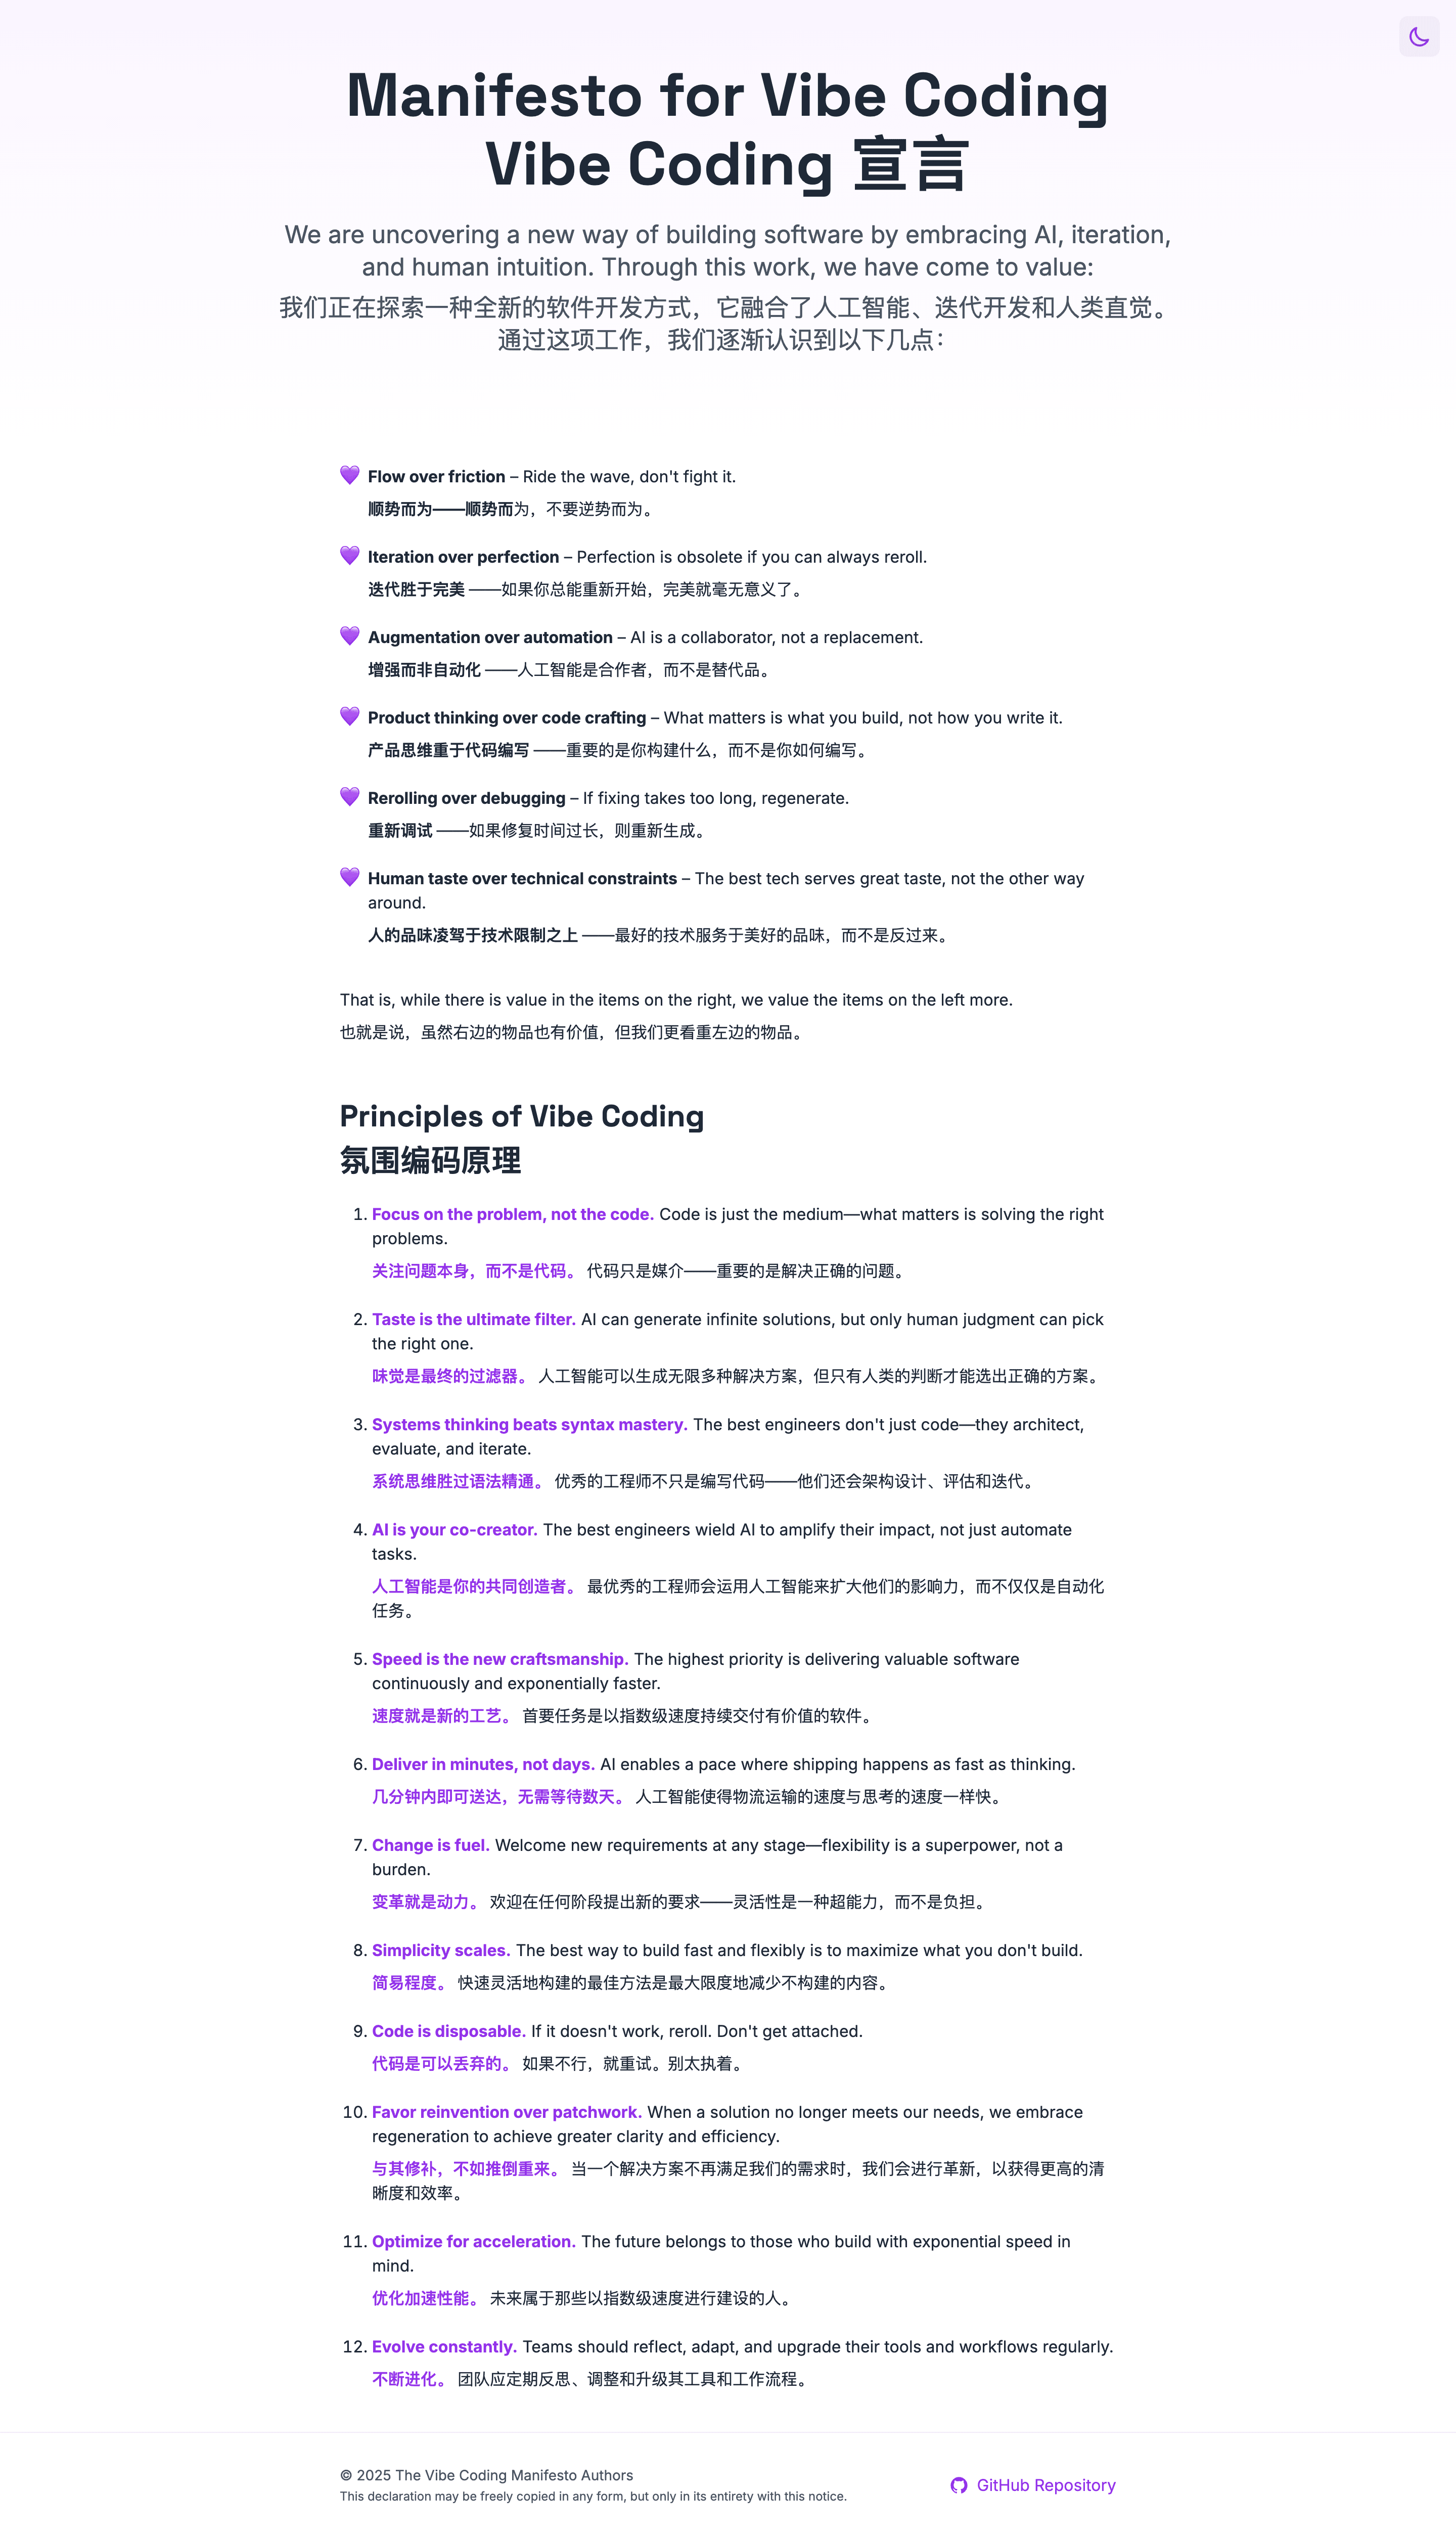
Here’s a knowledge base I recreated with Figma based on the designer’s mockups:
📖 Treasure Box Knowledge Base Design · Figma
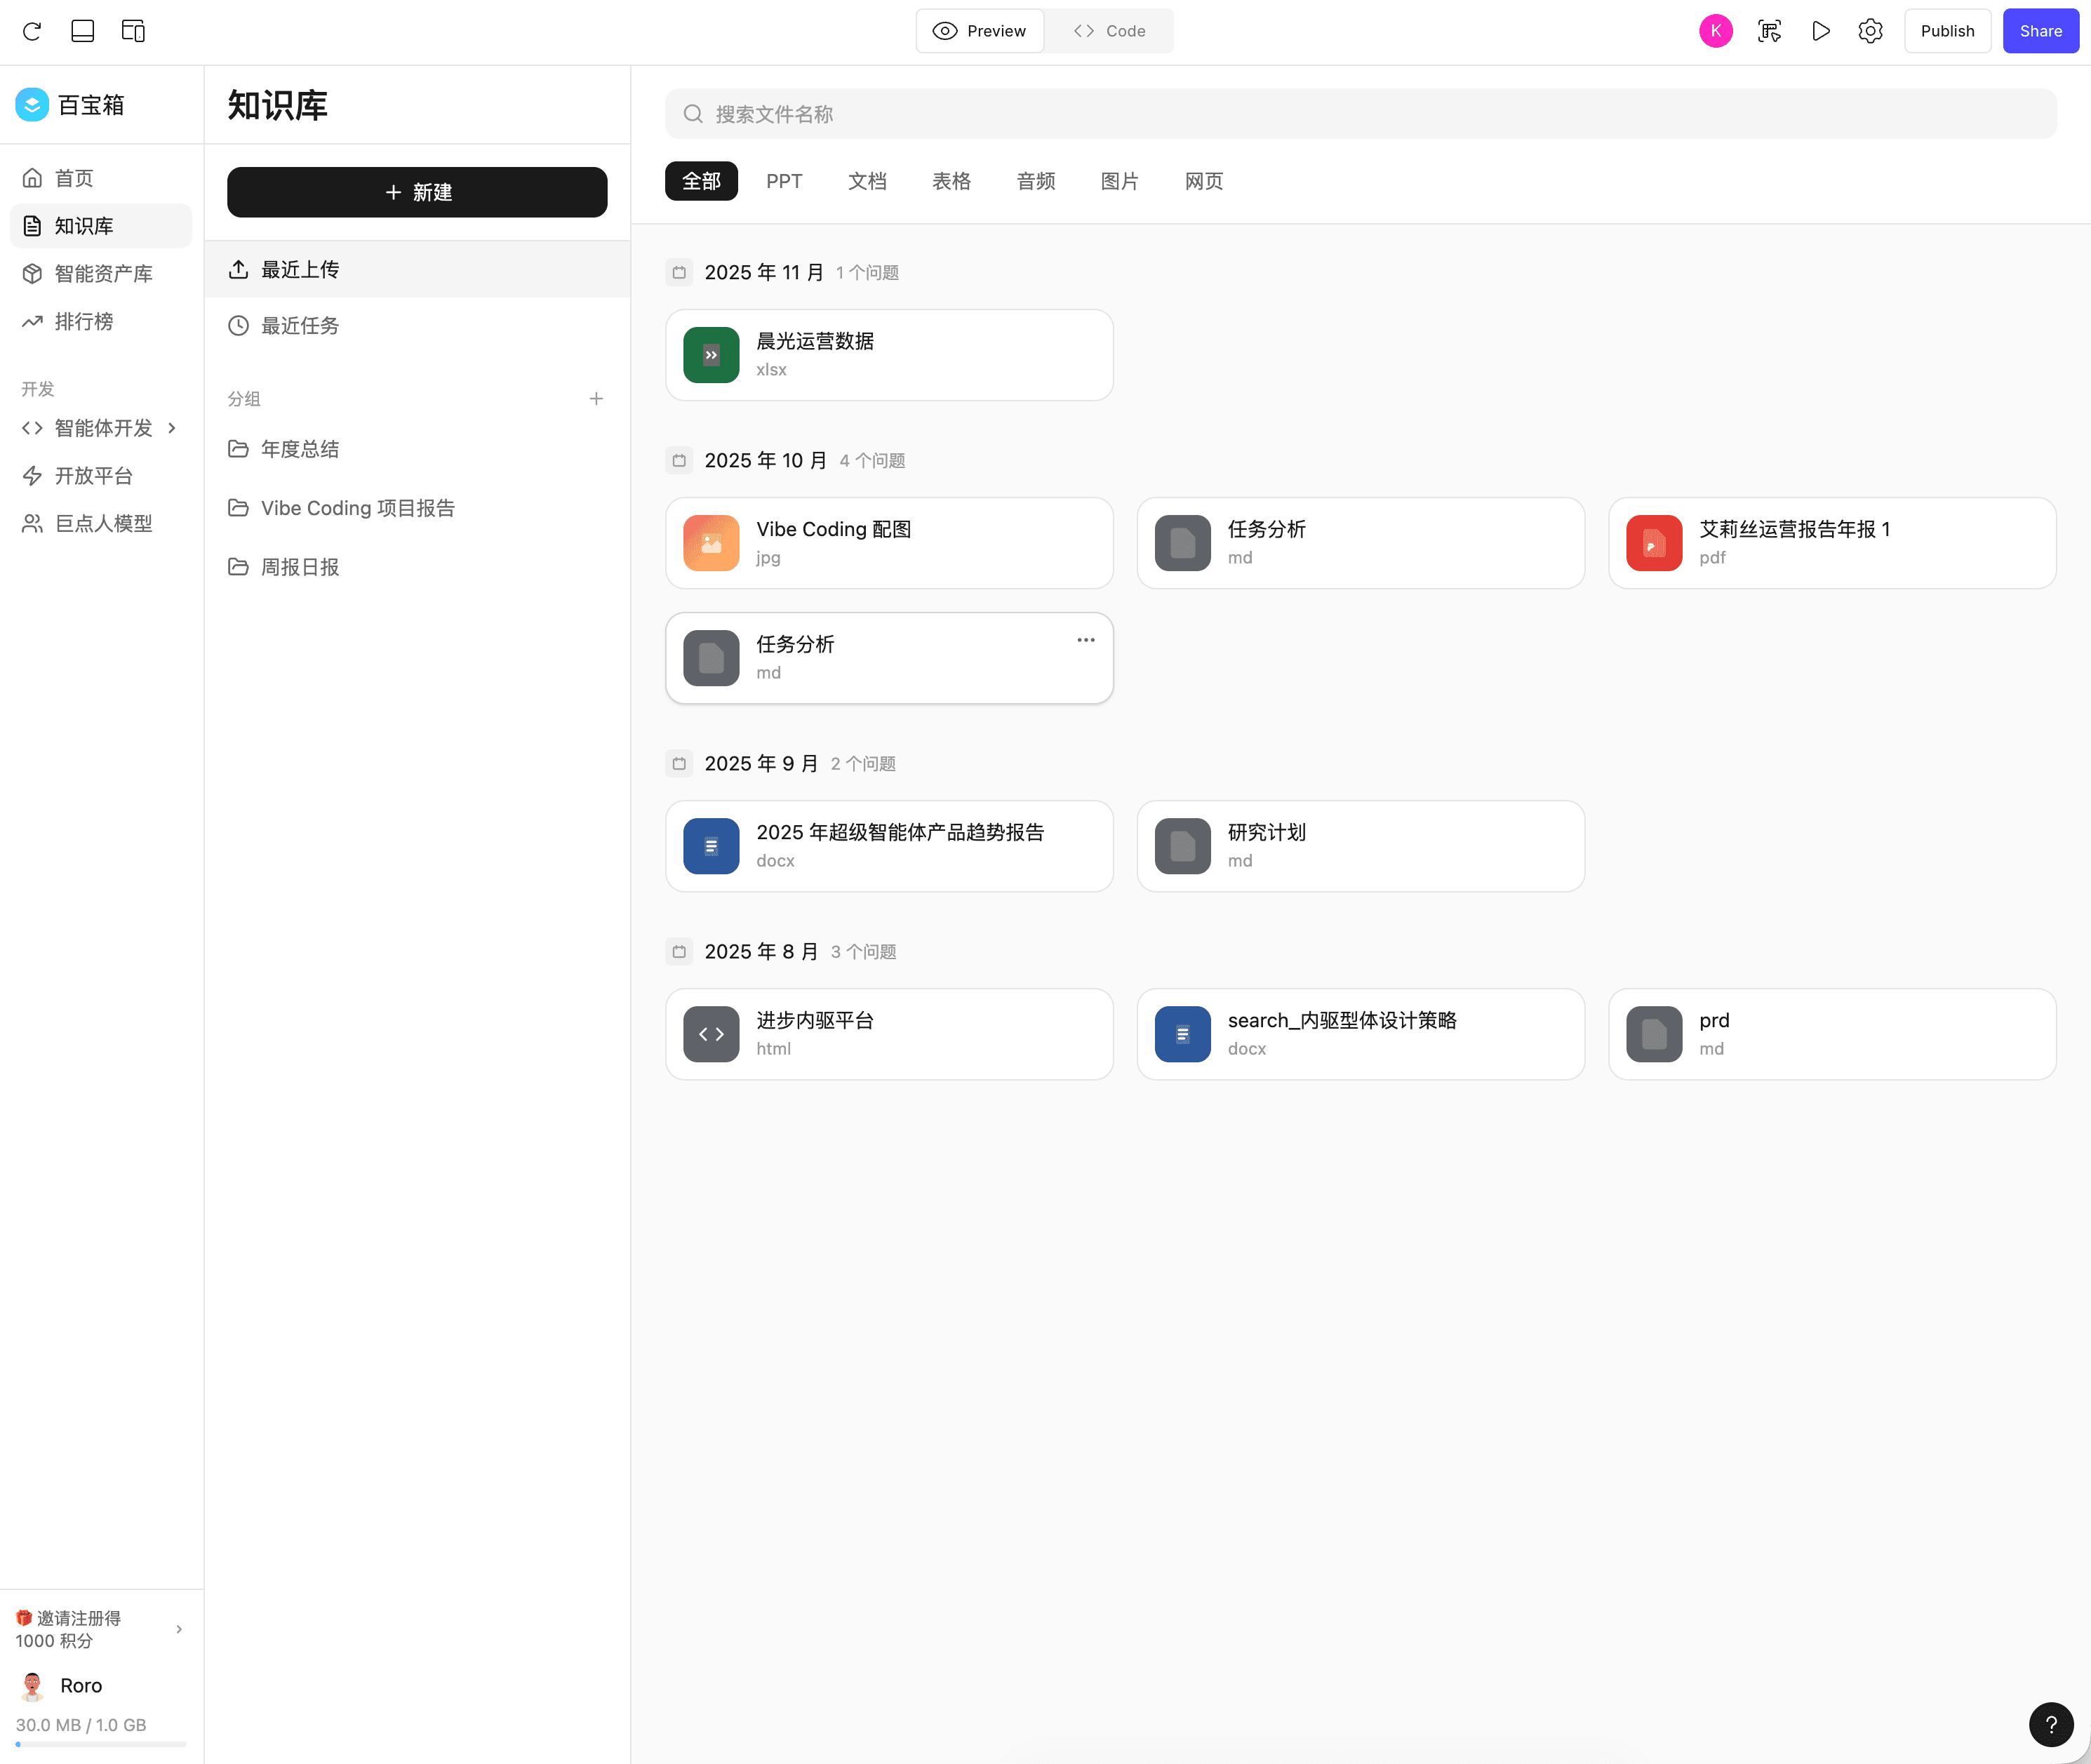
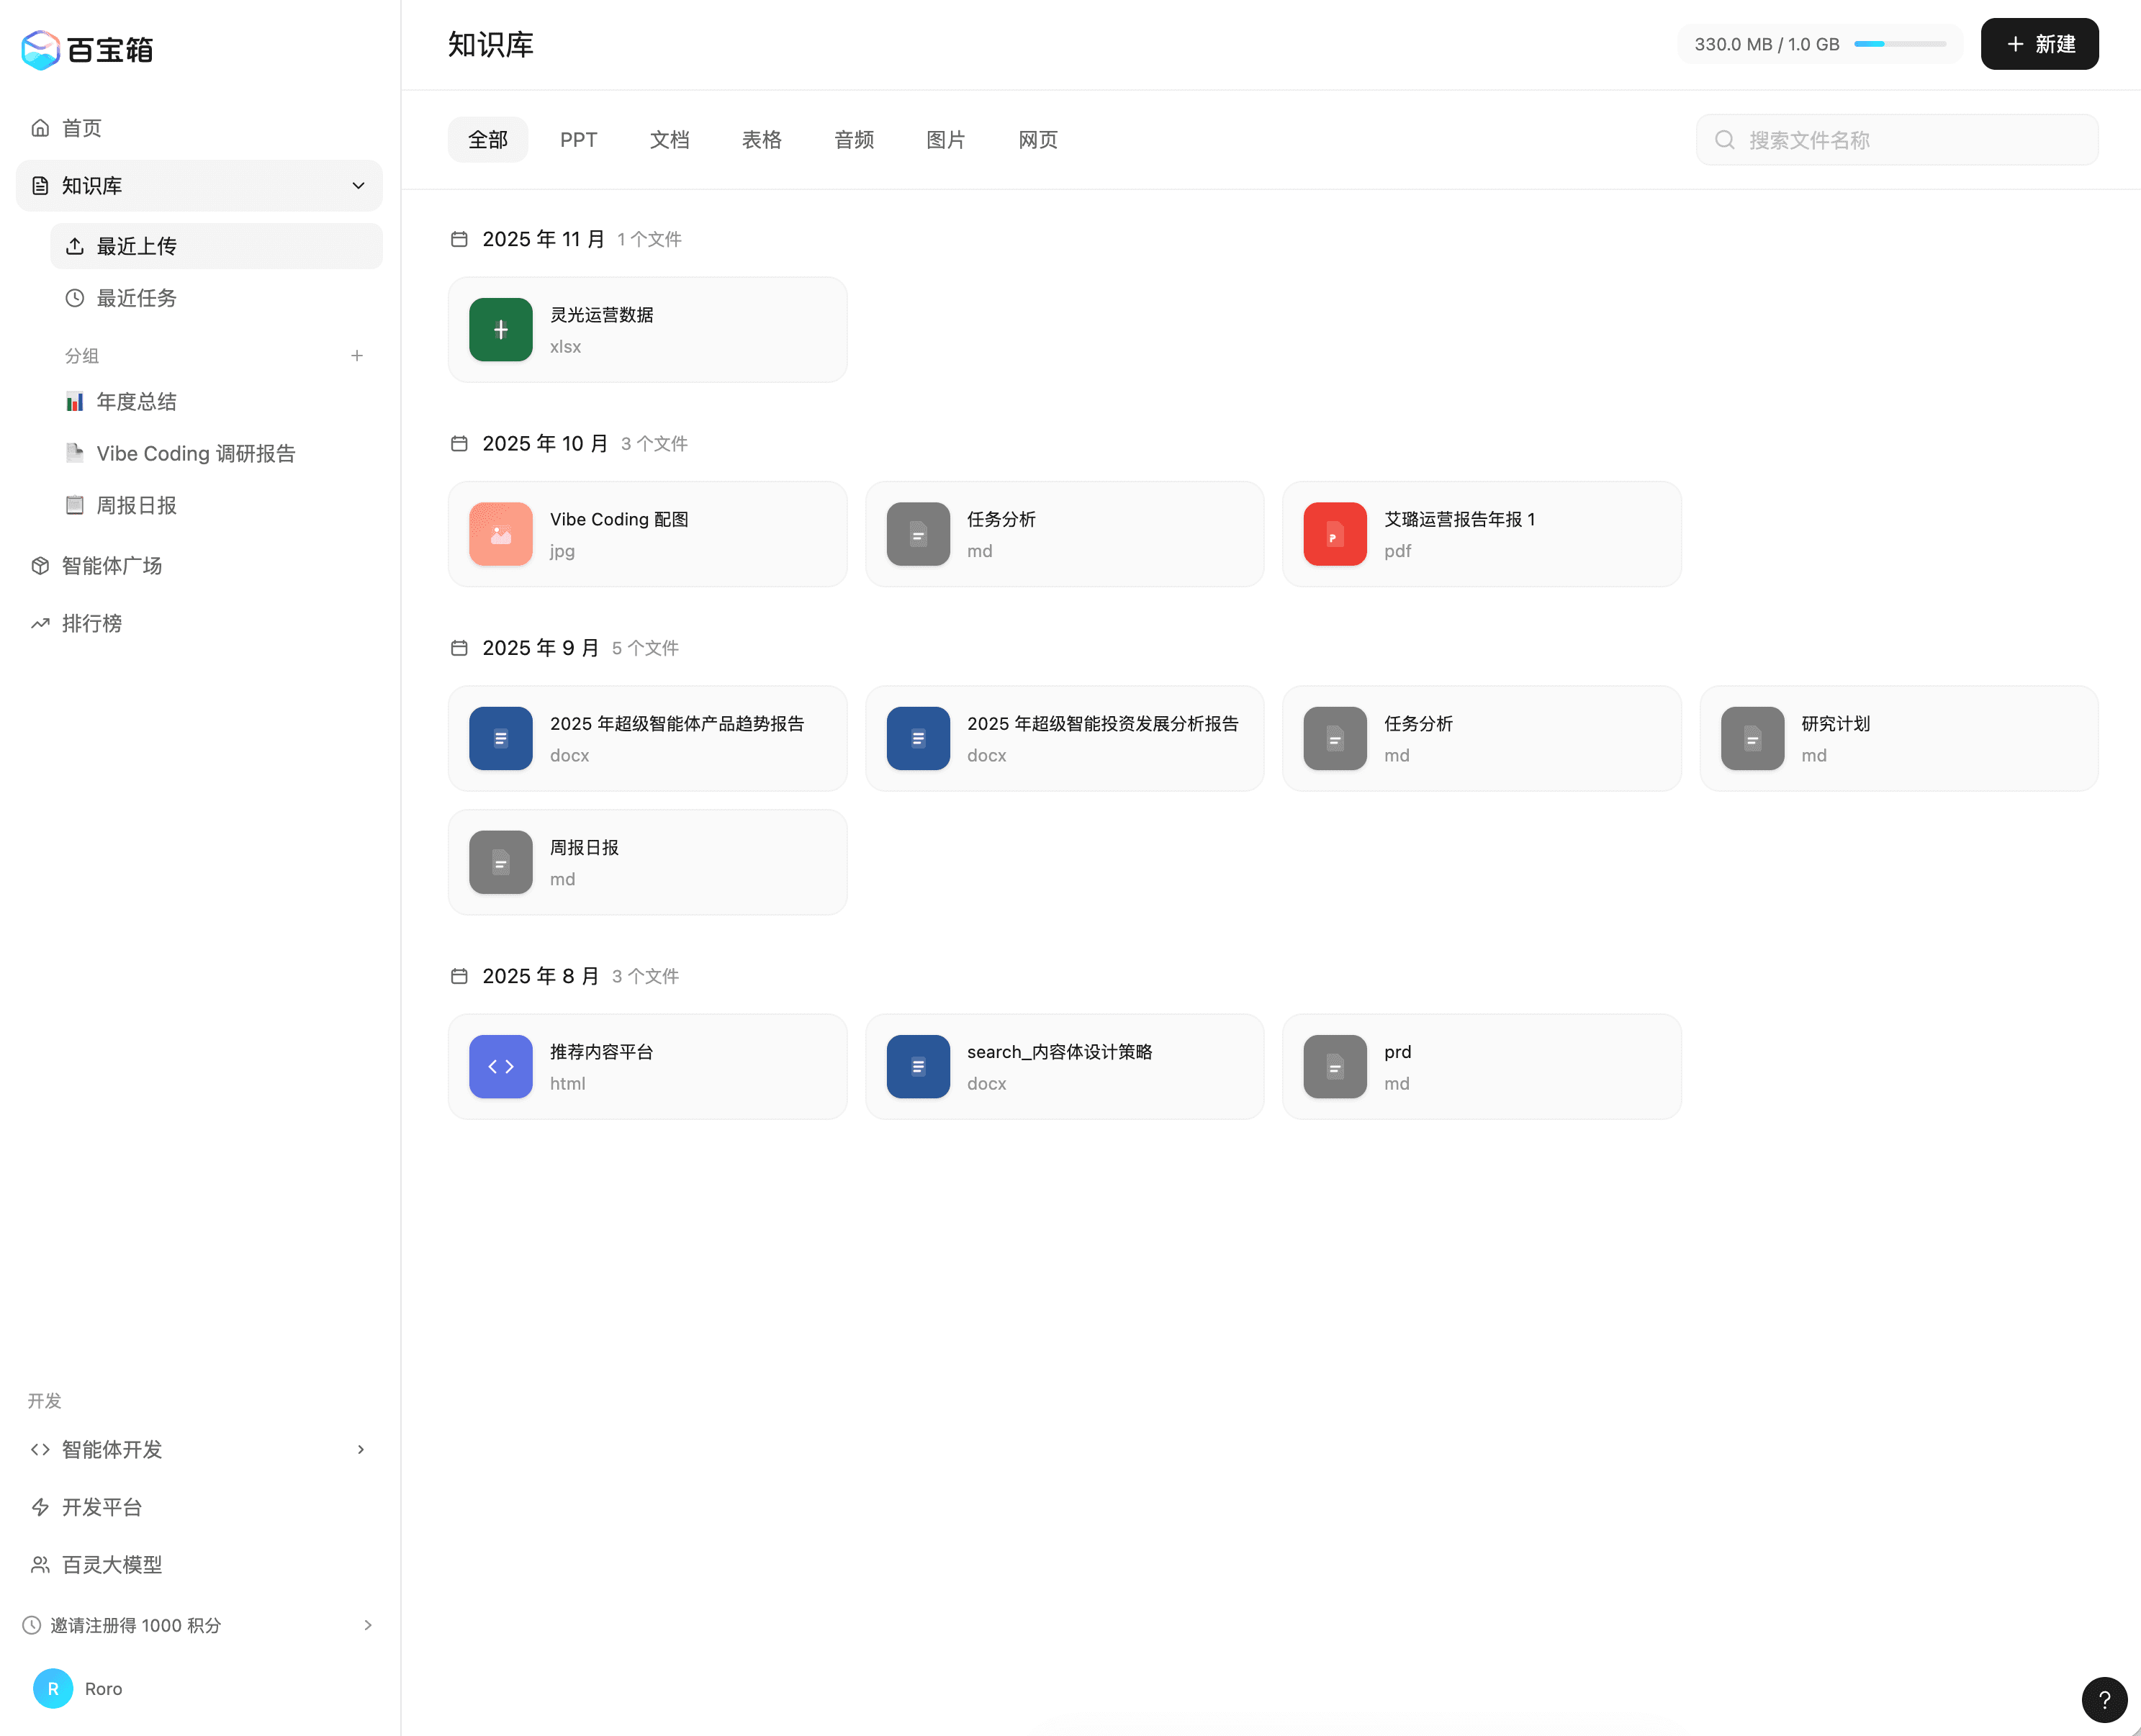
Left: Version 1, Right: Version 39
Left: Version 75, Right: Version 141
In this case, you can see:
- The overall page framework is correct, and key features are basically implemented
- Can be combined with visual editor for fine adjustments
- The model is smart - it basically won’t damage areas that shouldn’t be affected. If there’s a risky action, it will confirm with the user
- Downside: Usage quota is too limited
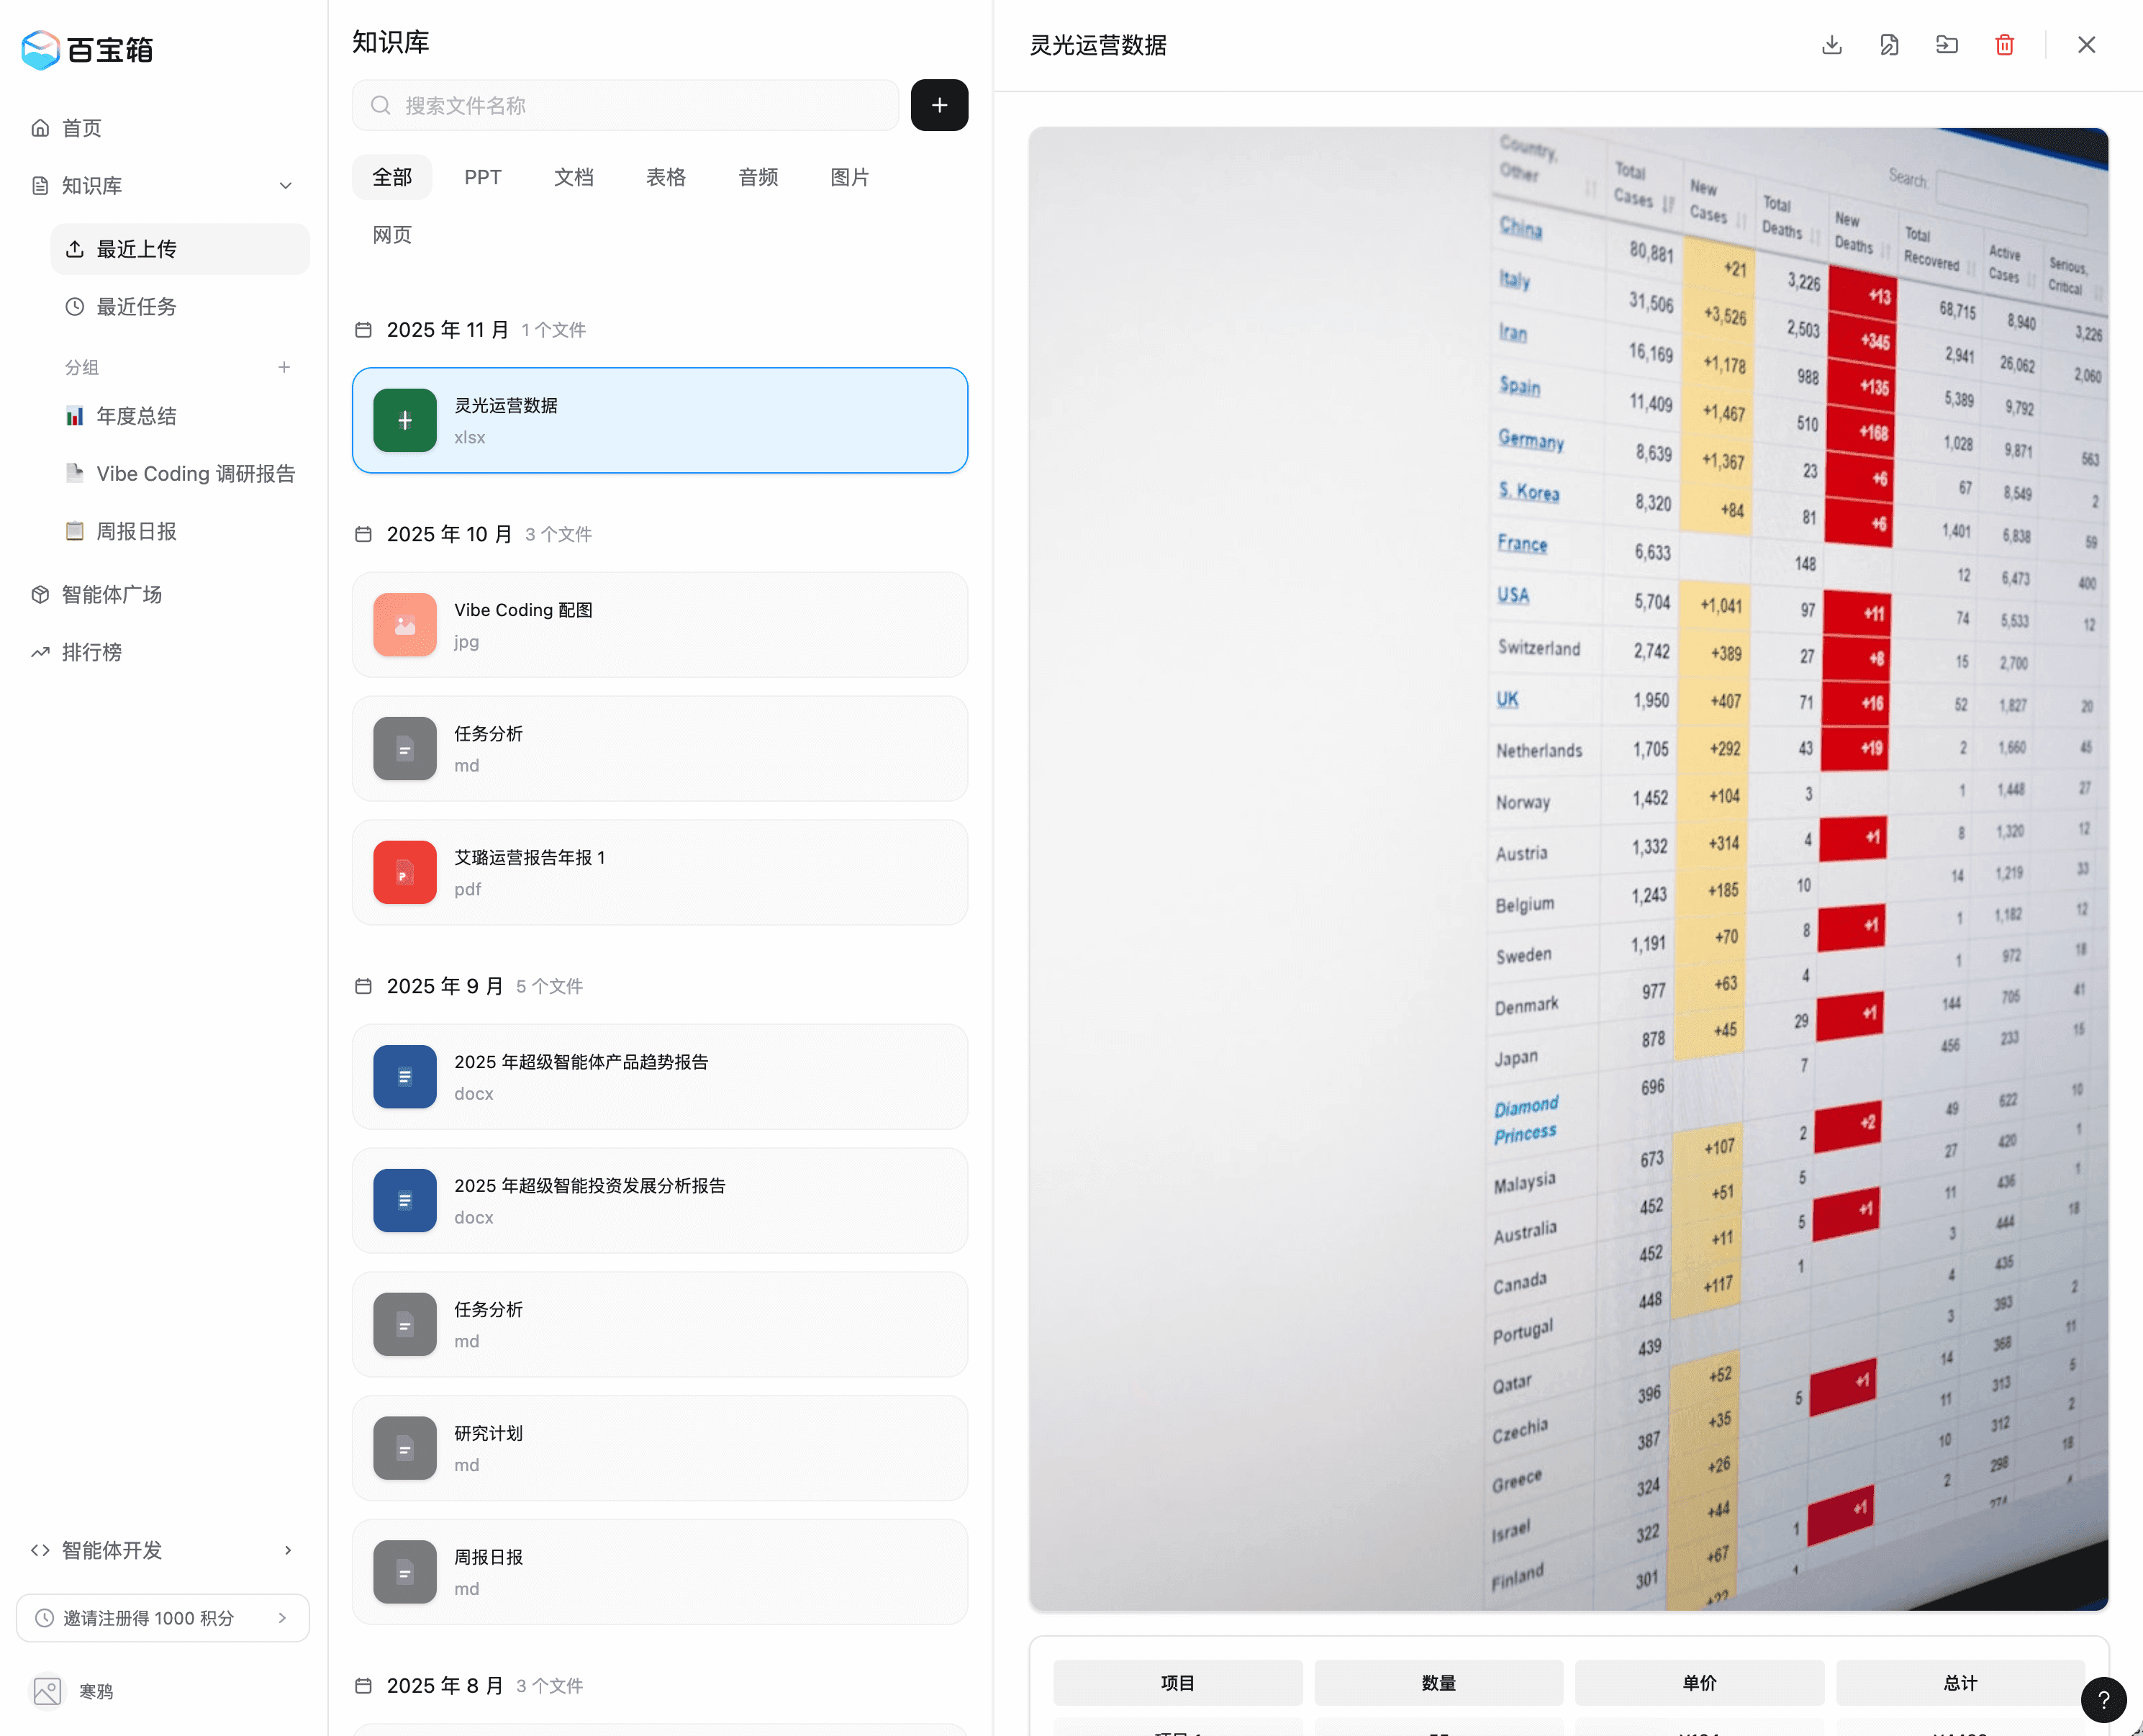
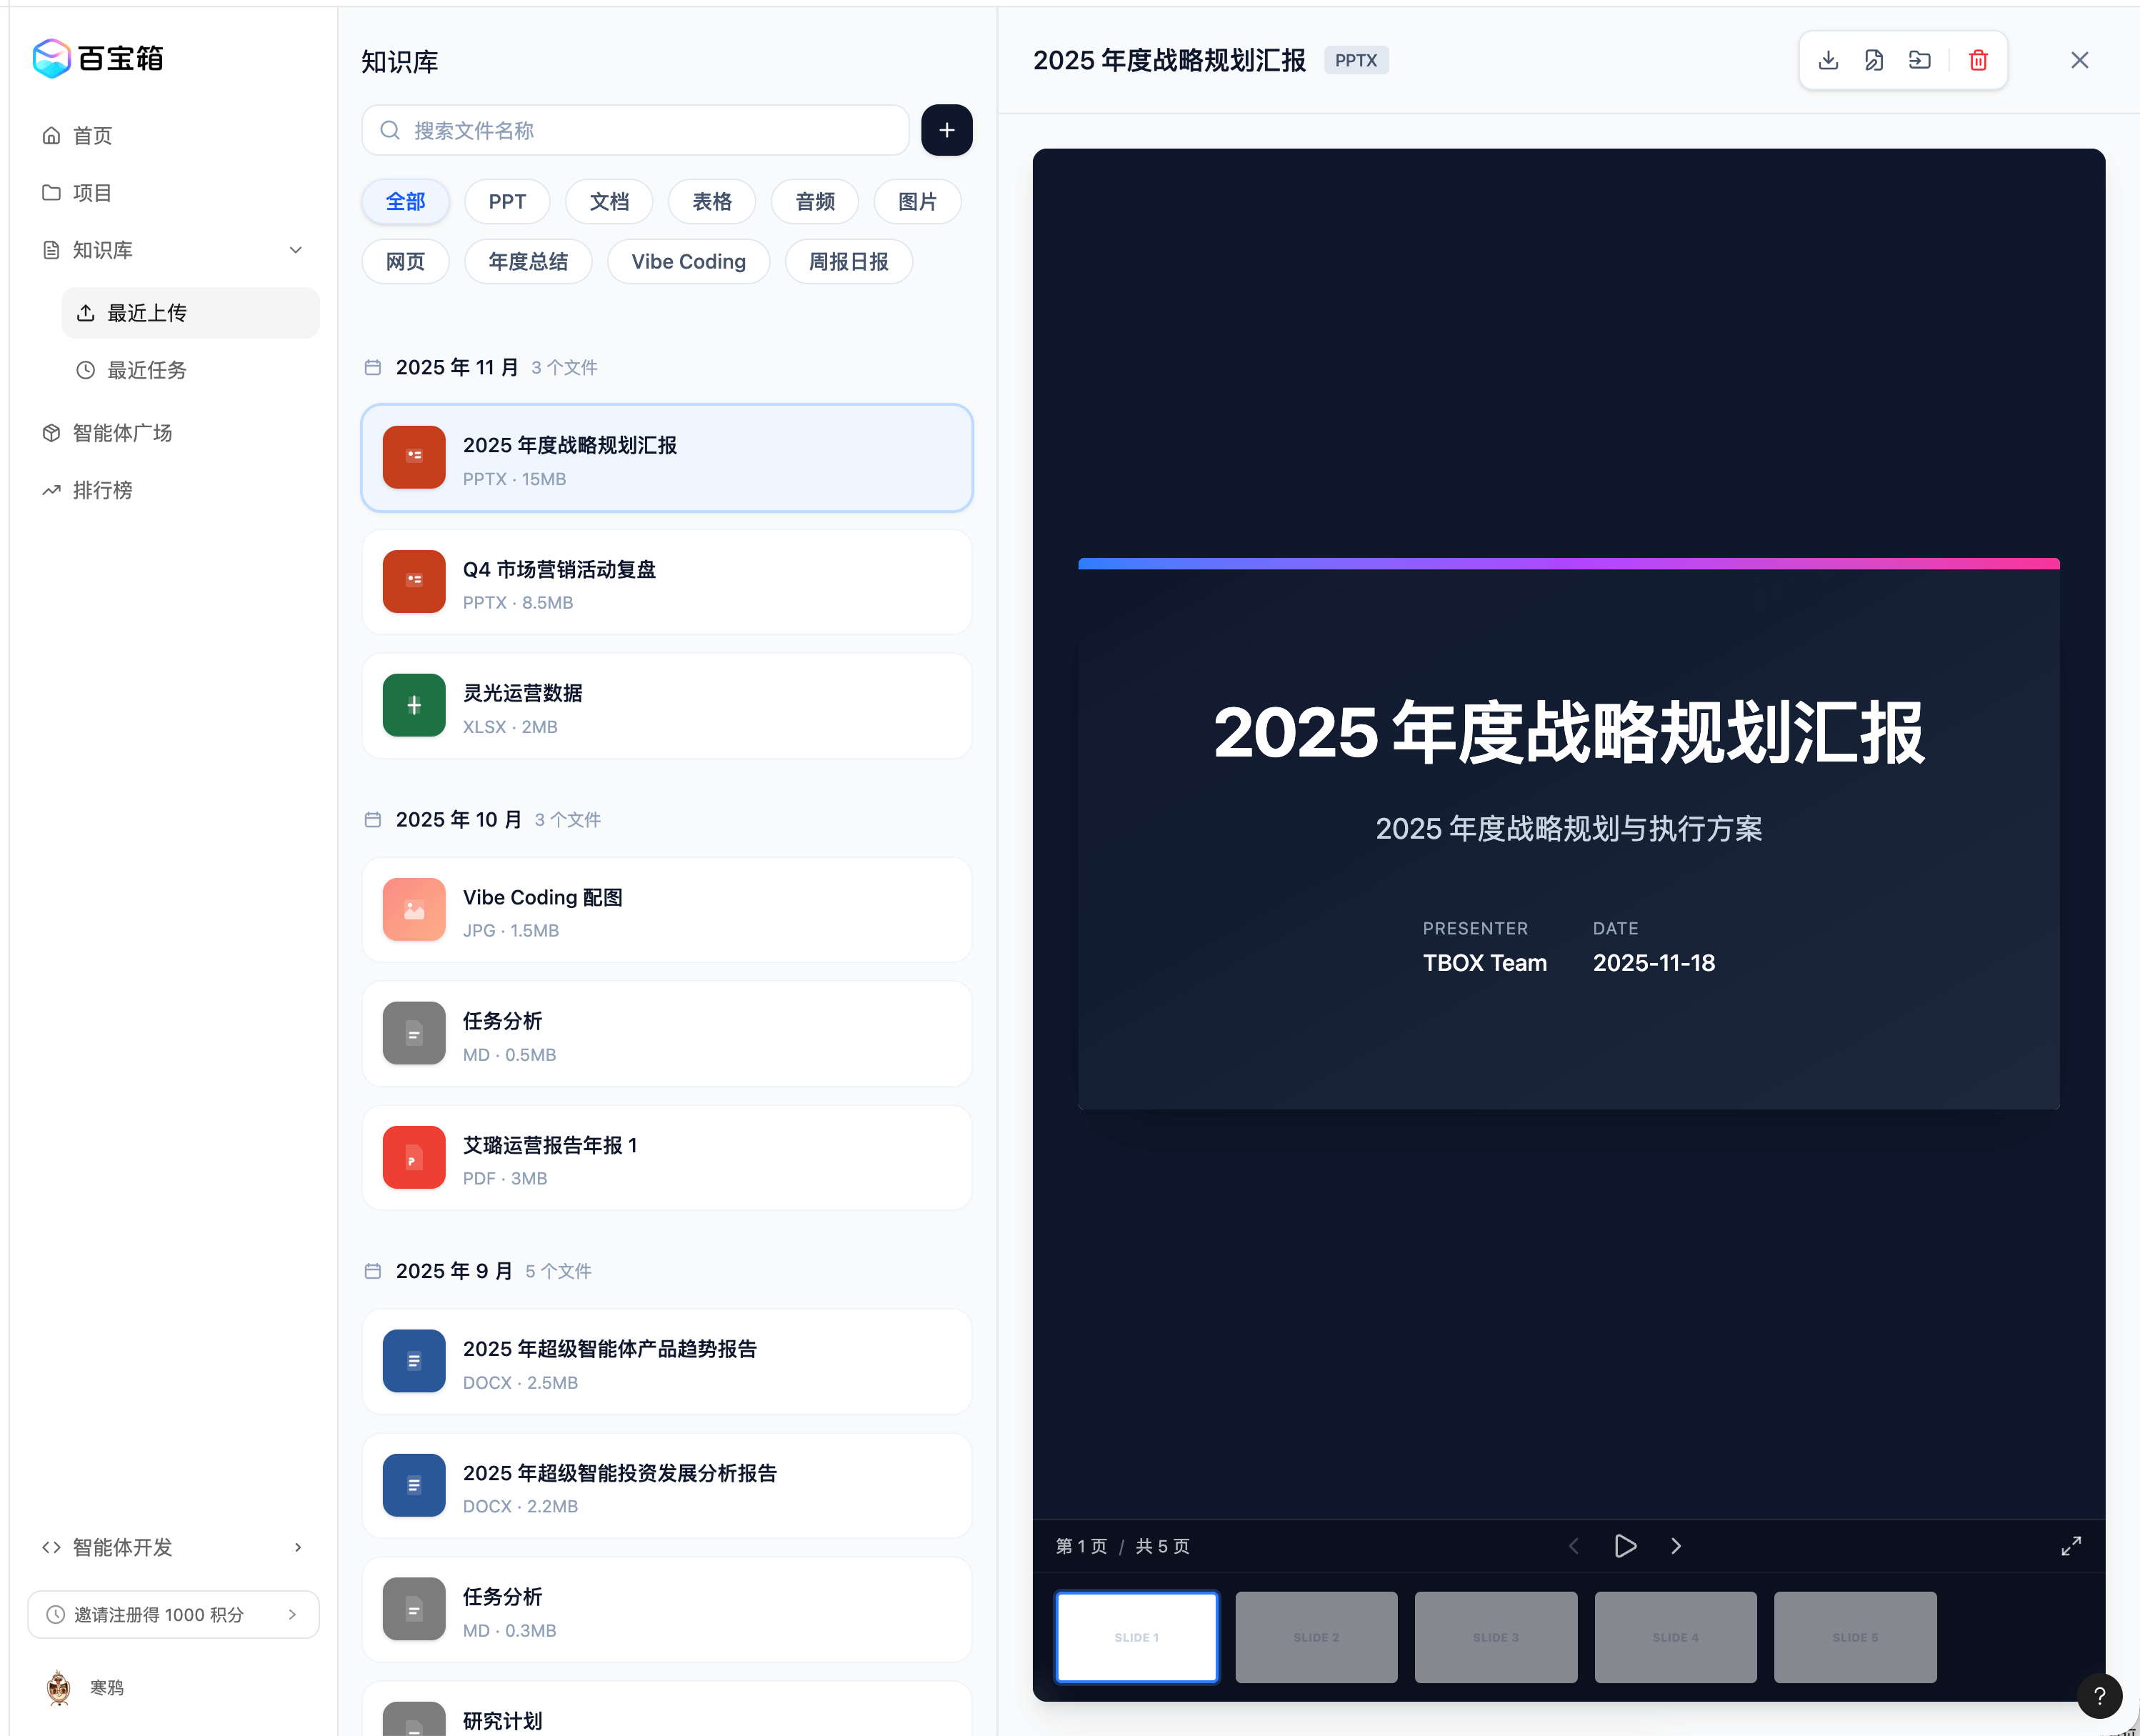
Looking back at the demo, around round 35, after some experience, I realized the three-column layout wasn’t a good solution. After quickly adjusting a few versions, I confirmed with the team that the new approach was better.
Later, it was constant back-and-forth with the model adjusting various styling details, going through 141 rounds and exhausting my subscription quota. Lesson learned: Use Figma Make to generate UI from image resources and get it to a basic state, but for subsequent style or UI adjustments, download locally and let Claude Code handle it 💦
Case Study 3: Building Ling Studio Admin Dashboard with Github Spec Kit
Before introducing the case, let’s align on granularity: SDD (Spec Driven Development). Like many emerging terms in this fast-evolving field, the definition of “Spec Driven Development” is still changing. Here’s my summary: Spec Driven Development means writing a “specification” (think of it as a PRD) before writing code, then using AI to develop. The specification becomes the source of truth for both humans and AI.
In this development model, product iteration means continuously evolving the specification. Documents composed of natural language are elevated to a higher level. Vibe Coders primarily deliver these documents, while code is just the AI translating documents into machine-executable solutions. In other words, specifications are the primary source code files. Over time, only specifications will be edited by humans - humans never touch the code.
What is a Spec
At this point, you might not have a precise definition of what a Spec is. The closest consistent definition I’ve seen is comparing specifications to “Product Requirements Documents.”
Github Spec Kit
github/spec-kit: 💫 Toolkit to help you get started with Spec-Driven Development
While at the concept level, everyone can only reach a vague standard, specific tools have clear definitions. In this case, we’ll focus on Github’s own spec kit. Here’s its definition:

Next, we’ll combine the Ling Studio case study to elaborate. First, the project demo:
How to Build Applications Step by Step Based on Spec
Traditional development model:
Requirements gathering (Deep Research Agent + Claude assistance) -> Requirements analysis (Requirements analysis agent) -> Tech stack selection -> Solution design (Solution design agent) -> Prototype design (manual) -> Data structure design (LLM assisted) -> VibeCoding -> Frontend fine-tuning (Vibe Coding) -> Frontend-backend integration (Vibe Coding) -> Testing -> Release
SDD with Github Spec kit:
- Use
/speckit.constitutionto define the project’s “constitution”: In this step, we need to clarify the project’s management principles and development guidelines that will guide all subsequent development. Every change to the application must comply with the constitution.- 👉 Case: Ling Studio’s constitution
- 👉 Every commit message must be in Chinese
- 👉 Mock content must use Chinese and follow Pangu spacing
- Use
/speckit.specifyto describe what you want to build. Focus on “what” and “why”, not the tech stack.- 👉 Case: Ling Studio’s specification
- 👉 Each spec’s scope shouldn’t be too large
- 👉 Describe features from user perspective (User Story), user journey
- 👉 Provide some edge cases (optional)
- Use
/speckit.planto provide tech stack and architecture choices, create implementation plan.- 👉 Case: Ling Studio’s implementation plan
- 👉 Recommended frameworks:
- Frontend framework: Next.js
- Frontend components: Shadcn/UI, Ant Design - the former is something LLMs excel at, the latter considering upstream/downstream collaboration
- Backend languages: TypeScript, Python, Java
- Database, auth, storage infrastructure: Supabase
- 👉 In this step, the model will search online to find good solutions or implementations
- 👉 In this step, you can also input data structure design (migration) to the model
- Use
/speckit.tasksto create an executable task list from the implementation plan- 👉 Case: Ling Studio’s task list
- 👉 Make sure to carefully read task.md - it’s the last step before the model starts coding. If there are deviations in the plan, adjust through multiple conversations.
- Use
/speckit.implementto execute all tasks- 👉 Case: Ling Studio’s execution record
- 👉 The model won’t execute all tasks at once. During execution, you can add details or change requirements anytime. Once satisfied, make sure to have the LLM update all documents under /spec according to the latest plan (a painful lesson)
- 👉 Commit frequently, commit frequently, commit frequently (a painful lesson)
- Validate promptly, commit code, merge branches, create new branch for next iteration, endless progress
For me, the benefits of this model:
Pros
- Process standardized through tools
- Effective breakdown of “large” projects
- Recommended approaches for different complexity levels:
- Simple UI adjustments: Describe verbally or adjust manually
- Page-level refactoring or small feature implementation: Plan mode
- Large features or major refactoring involving frontend/backend (or database): spec-kit
- Recommended approaches for different complexity levels:
- Work leaves traces, documented, recordable
Shortcomings:
Cons
- For simple UI and feature adjustments, spec-kit won’t proactively update spec.md and task.md, needs reminding
- Really token-intensive
- For production-grade systems, security-sensitive, complex architectures, although spec seems to cover these, unsure if it’s sufficient
- Only reached Ant Code, hasn’t gone to production yet
Final Thoughts